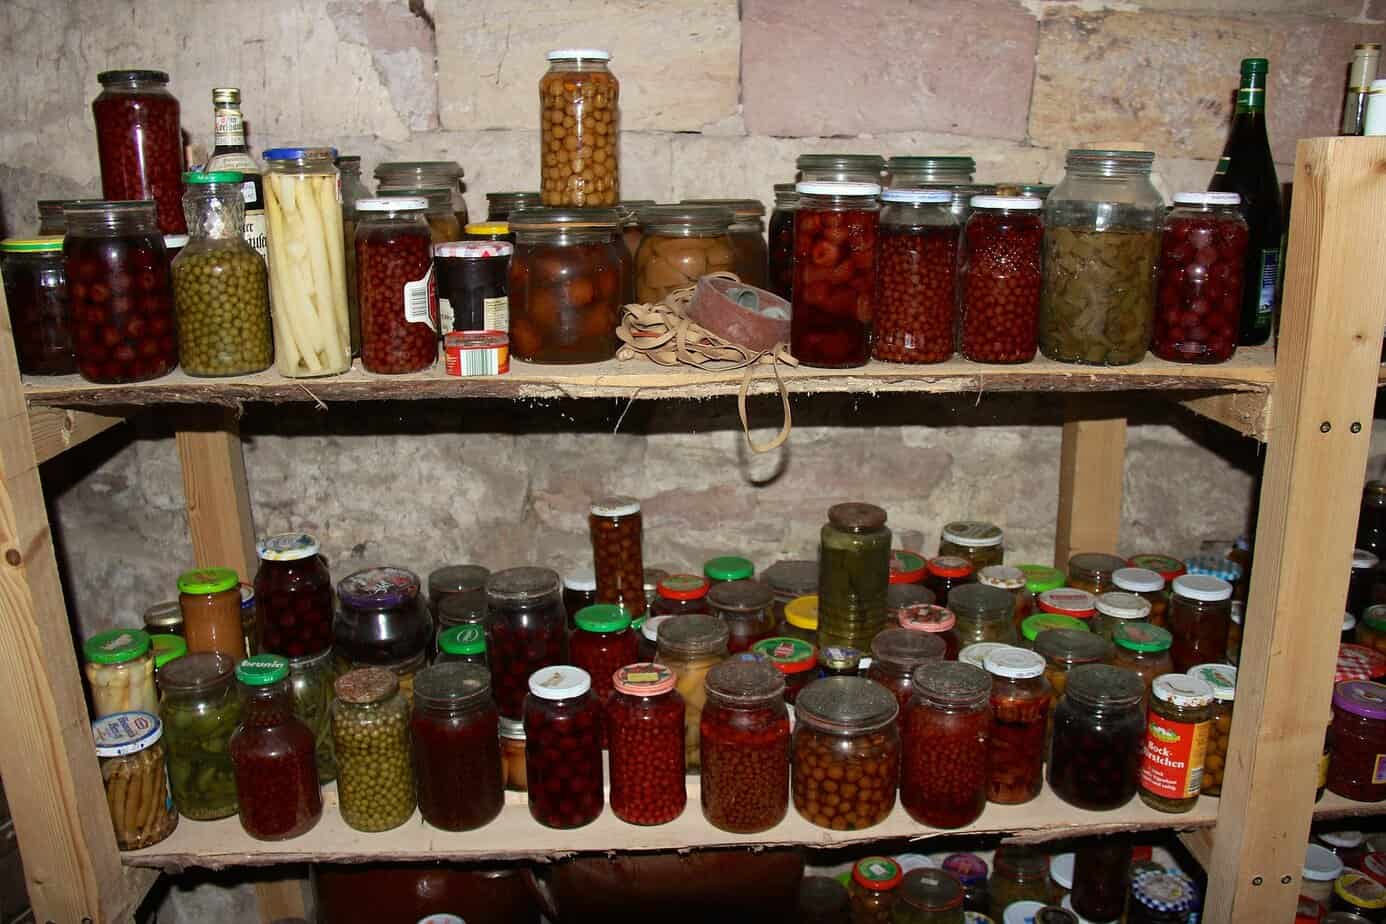
You’ve got the setup done and the shelves are built, the temperature’s stable, and the humidity’s under control. Your basement finally looks like the prepper stronghold you always envisioned. But here’s the truth: setting up long term food storage in basement is only half the battle.
The other half is keeping it viable year after year. Food doesn’t just sit there unchanged, it quietly reacts to air, moisture, time, and neglect. Labels fade, cans rust, seals weaken, and pests test every corner for a way in. That’s why every seasoned prepper treats their basement not as a vault, but as a living system that needs maintenance and vigilance.
In this second part of our series, we’ll cover the practices that make your stockpile truly long-term: rotation schedules that prevent waste, data-backed inspection habits, mold and pest defense, redundancy strategies that protect against total loss, and lessons shared by veteran preppers who’ve been doing this for decades.
Whether you’re safeguarding a few months of food or a multi-year reserve, the maintenance principles behind long term food storage in basement will make the difference between “stored food” and “food security.” Let’s make sure your system not only stands the test of time, but improves with it.
Extending Shelf Life: Rotation and Maintenance for Long Term Food Storage in Basement
There’s a quiet misconception that once food is sealed, stored, and stacked, the job’s done. But even the best long term food storage in basement setup will fail if it’s forgotten. Food doesn’t care about your intentions, it responds to time, temperature, and exposure. That’s why rotation and regular maintenance are the backbone of a lasting, reliable food reserve.
If you talk to veteran preppers, you’ll notice a pattern: they all have systems. Not just “stuff on shelves,” but labeled, dated, and organized inventories that function like a mini supply chain. It’s not overkill, it’s insurance. Because the only thing worse than running out of food in a crisis is discovering that the food you thought would save you went bad two years ago.
The FIFO Method (First In, First Out)
The FIFO system is prepper gospel for good reason. It’s simple, scalable, and eliminates waste. Every time you buy or store new food, it goes behind the older stock. When you need something, you grab from the front. This constant cycling ensures nothing ever ages past its safe or optimal point.
For long term food storage in basement setups, FIFO works best when paired with clear labeling. Use permanent markers or paint pens to note:
- Storage date
- Expected “rotate by” date
- Contents (especially if in opaque buckets)
Some preppers use color-coded stickers, green for new, yellow for mid-term, red for nearing rotation. Whatever method you pick, consistency is key.
The Inspection Routine
Once or twice a year, do a full visual and tactile inspection. It’s not glamorous, but it’s vital. Look for:
- Rust or swelling on cans
- Moisture rings or sticky residue on jars
- Soft spots or leaks on Mylar bags or buckets
- Condensation behind shelving or on walls
- Musty odors (a sign of fungal growth or spoilage gases)
Use this inspection to update your inventory log, a simple spreadsheet, notebook, or even an app like Airtable or Google Sheets works fine. Record quantities, expiration estimates, and environmental data (temperature/humidity readings). Over time, you’ll build a personal reference guide for how your basement behaves, and how your food responds.
Temperature and Humidity Logging
Remember from Section 2: every 10°F increase cuts shelf life in half. So, track it. A $20 digital thermo-hygrometer can record and display weekly averages. When your readings stay steady (ideally around 55°F and 40-45% humidity), you’ll know your food’s longevity is right on track.
Handling Oxygen Absorbers and Mylar Bags
One mistake even experienced preppers make is reusing or mishandling oxygen absorbers. Once exposed to air, they start working and within 15–30 minutes, they’re mostly spent. Always reseal unused ones in vacuum jars or small Mason containers. When inspecting buckets, check the vacuum seal: the Mylar should feel tight, not loose or ballooned. A soft, inflated feel means the absorber failed or the bag wasn’t sealed properly.
For long-term security, double-bag sensitive foods like flour, oats, or pasta, one inner Mylar and one outer food-grade bucket. This redundancy gives your long term food storage in basement added resistance to punctures and oxygen intrusion.
Rotation Intervals by Category
Here’s a general guideline (assuming optimal basement conditions):
- White rice: Check every – 12 months, Expected shelf life: 25-30 years
- Wheat berries: Check every – 12 months, Expected shelf life: 30+ years
- Beans & lentils: Check every – 12 months, Expected shelf life: 20-25 years
- Canned goods: Check every – 6 months, Expected shelf life: 2-10 years
- Freeze-dried foods: Check every – 24 months, Expected shelf life: 25-30 years
- Dehydrated foods: Check every – 12 months, Expected shelf life: 5-10 years
- Sugar, salt, honey : Check every – 24 months, Expected shelf life: Indefinite
Keep in mind, “shelf life” means best quality, not “safe to eat.” Food stored properly can outlast the listed range, but taste and nutrition slowly degrade over time.
Digital Tools and Checklists
Modern preppers are blending old-school discipline with digital tracking. Apps like Sortly, PrepperLog, or simple Google Sheets templates can automate reminders for rotation dates and quantities. QR labels are also becoming popular, scan a code, and your entire bucket inventory pops up on your phone.
Maintaining long term food storage in basement is more about habit than hardware. A few hours a year spent checking, rotating, and recording can extend your food’s lifespan by decades. Think of it like maintaining your generator, it’s not exciting, but when the power’s out, you’ll be glad you did.
It’s the quiet maintenance work, the labeling, the logging, the checking, that turns an ordinary basement into a true food security system.

Defending Your Long Term Food Storage in Basement from Pests and Mold
You can have the perfect temperature, flawless rotation, and the best Mylar bags on the market, but if pests or mold get in, it’s game over. The basement may feel sealed off, but mice, insects, and spores are persistent. They don’t need an open door, just a gap, a crumb, or a humid patch to start wreaking havoc. Protecting your long term food storage in basement from these silent invaders is as essential as sealing the food itself.
Rodents: The Smartest Thieves in the Basement
Mice and rats are relentless. They can chew through thin plastic, cardboard, and even light-gauge aluminum. If your food gives off a scent, and almost all of it does, they’ll find it. That’s why seasoned preppers use layered defense.
Seal the perimeter: Walk your basement with a flashlight and check every opening, vent, window well, and utility line. Use steel wool, copper mesh, or hardware cloth (¼ inch or smaller) to block entry points. Spray foam can help fill gaps, but always back it with metal mesh first, rodents chew right through foam alone.
Store smart: Keep all food inside metal bins or sealed buckets. Mylar bags are excellent for airtight protection, but they’re not rodent-proof on their own. Always place them inside a hard container.
Bait and monitor: Use snap traps or electronic traps, not poison. Poisoned rodents tend to die in walls and create odor and contamination risks. Keep traps around the perimeter, not near the food itself.
A simple trick from veteran homesteaders: scatter a few bay leaves or place peppermint oil, soaked cotton balls near shelves. Mice dislike strong scents and often avoid those areas entirely.
Insects: The Invisible Saboteurs
Weevils, moths, and beetles love stored grains and if you bring them in, they’ll breed silently until your rice turns to dust. The key to protecting your long term food storage in basement from insects is prevention before packaging.
- Freeze dry goods before sealing. Place grains, rice, or flour in the freezer for 48-72 hours before storing. This kills any hidden eggs.
- Use oxygen absorbers inside Mylar bags. Most insects can’t survive below 0.1% oxygen.
- Inspect store-bought foods before adding them to your basement inventory. One infested bag can compromise an entire zone.
- Keep pantry moth traps near entryways or ventilation openings as early warning indicators.
Mold: The Silent Destroyer
Mold is the enemy that doesn’t need movement, only moisture. Even if you’ve sealed your buckets perfectly, surface mold can grow on cardboard boxes, labels, and shelving in humid basements.
To defend against it, focus on environmental control:
- Maintain humidity below 50% year-round using a dehumidifier.
- Use mold-resistant paint (like Kilz or Zinsser) on walls and ceilings.
- Wipe shelves with white vinegar or 70% isopropyl alcohol during seasonal checks.
- Keep airflow consistent with fans or small vents, stagnant corners are prime mold territory.
Never ignore smells. A musty odor means moisture somewhere, even if it’s not visible. Track it immediately with a moisture meter or thermal camera. Mold rarely announces itself until it’s already damaging labels, boxes, and cans.
Material Choices Matter
Every part of your long term food storage in basement should resist decay. Avoid cardboard, it’s basically pest bedding. Plastic totes work well but choose HDPE (High-Density Polyethylene) over brittle storage bins; it’s thicker, more durable, and rodent-resistant. Metal shelving or coated wire prevents mold buildup far better than untreated wood.
For soft goods like flour or sugar, vacuum-seal them first, then store the sealed bags in 5-gallon food-grade buckets. This adds redundancy, if one barrier fails, the next one holds.
Seasonal Pest Audit
Twice a year, perform what experienced preppers call a “quiet night check.” Turn off all lights, wait a few minutes, and listen. Rodents make soft scratching or chewing noises, especially along baseboards and near pipes. Look for droppings, gnawed corners, or small dirt trails. Early detection saves entire stockpiles.
Every veteran prepper knows that long term food storage in basement isn’t about filling space, it’s about preserving safety. Pests and mold are nature’s way of reclaiming what you’re trying to protect. But when you learn their habits and prepare with precision, your food stays yours.
Control the environment, block every entry, and never assume the fight is over. A dry, sealed, scent-free basement is a fortress, and your food is its treasure.
Redundancy Planning: Beyond the Basement Food Storage
Every prepper eventually learns one hard truth: nothing is foolproof. Even the most carefully controlled long term food storage in basement can be compromised. Floods, leaks, pests, or even a simple oversight, one weak seal, one power outage, can cost you months or years of security. That’s why redundancy isn’t paranoia; it’s strategy.
Think of your basement as Level One of your food system, the heart of your operation. But smart preppers build multiple layers of defense so that if one fails, others kick in seamlessly. The goal isn’t to double your workload; it’s to spread your risk.
Layering Your Food Security
A true redundancy plan has three main tiers:
- Primary storage: your basement, stable, climate-controlled, accessible.
- Secondary storage: a secondary location in your home or on your property.
- Offsite or mobile storage: caches, vehicle kits, or remote shelters.
Tier One – The Basement
Your long term food storage in basement should hold the bulk of your calories, staples like grains, beans, canned goods, and freeze-dried meals. Keep it highly organized, with rotation and monitoring systems already in place (as covered in previous sections). But remember: centralizing everything in one spot is efficient, not invincible.
Tier Two – The Redundant Home Zone
Set up a smaller “satellite pantry” somewhere above ground. Closets, garages, and even under-bed containers can serve as secondary reserves. Focus on foods that tolerate slightly higher temps but are still shelf-stable:
- Peanut butter, granola, and energy bars
- Dried fruits and nuts (rotated every 6-12 months)
- Powdered drink mixes and electrolyte packets
- Small canned goods for daily use
This tier serves two purposes, quick access in emergencies and a safety net if your basement becomes inaccessible.
Tier Three – Offsite or Caches
If you’re serious about prepping, consider a cache system, sealed food containers stored offsite, either on your property or nearby. Think of it as insurance for your long term food storage in basement.
Buried or hidden caches should focus on ultra-durable, high-calorie items like:
- White rice in double Mylar bags
- Lentils, oats, and dehydrated potatoes
- Sugar, salt, and vacuum-sealed jerky
- Canned meat or freeze-dried entrees
Use buried 5-gallon HDPE buckets with O-ring lids, double-sealed Mylar liners, and silica packs. Store them in waterproof duffel bags for extra protection. Log GPS coordinates privately, and ensure no container is directly visible or exposed to runoff areas.
Portable Redundancy
Sometimes, redundancy means mobility. Keep a small portion of your food preps ready to move, especially if evacuation becomes necessary. A 72-hour go-kit should include lightweight, calorie-dense foods that mirror your main stockpile: freeze-dried pouches, instant rice, dehydrated soups, and canned protein.
Some preppers extend this concept into vehicle-based storage, keeping emergency rations, a small stove, and water filtration gear in their truck or SUV. That mobile tier gives you flexibility when the unexpected happens, especially if your basement becomes temporarily unsafe.
Power Backup and Climate Control
If your long term food storage in basement depends on electrical dehumidifiers, fans, or environmental sensors, plan for outages.
- Use a battery backup or small solar generator (like Jackery or EcoFlow) to keep humidity control devices running for a few days.
- Store manual dehumidifying agents (silica gel, calcium chloride) as emergency backups.
- Keep temperature and humidity logs even during blackouts, those patterns reveal how quickly your basement environment drifts without power.
Cross-Training for Family Members
Redundancy isn’t just physical, it’s mental. Everyone in your household should know how to access, rotate, and monitor your stockpile. In a real emergency, it’s no use if only one person knows where the food is or how it’s organized.
Label sections clearly. Keep printed inventory lists in both your basement and a waterproof binder upstairs. If something happens to you, your family can maintain the system without hesitation.
Redundancy isn’t about fear; it’s about foresight. Even the most secure long term food storage in basement setup can fail if it stands alone. Diversifying your storage ensures that no single event, not a flood, not a power outage, not a broken seal, wipes out your lifeline.
In the prepper world, redundancy isn’t waste. It’s wisdom. You’re not just storing food; you’re storing time, options, and peace of mind.
Expert Insights: Veteran Preppers’ Lessons on Long Term Food Storage in Basement
If you spend enough time around seasoned preppers, you’ll notice something right away, none of them brag about how much food they’ve stored. They talk about how long it’s lasted. Because quantity is easy; longevity takes discipline, observation, and a bit of humility.
After years of fine-tuning, most experienced preppers agree that success with long term food storage in basement setups boils down to a few core habits and lessons learned the hard way.
Lesson #1: The Label Is as Important as the Lid
Veterans label everything, and not just the obvious stuff. Every bucket, bag, and can gets a storage date, rotation date, and contents. Some even note the original brand or supplier. Why? Because five years from now, you won’t remember which bucket has jasmine rice and which has lentils.
Good labels save time, prevent duplication, and make rotation smoother. Use industrial-grade permanent markers or paint pens, since humidity and time can fade ordinary ink. Laminated paper tags or adhesive vinyl labels are excellent for buckets and totes.
Lesson #2: Never Trust “Cool Enough”
Basements can trick you. What feels cool to the touch might still swing 10–15°F through the year, and that’s enough to cut shelf life in half. Veteran preppers treat long term food storage in basement like a controlled laboratory. They record temps and humidity, log seasonal patterns, and adjust.
The most reliable systems include:
- Digital hygrometers and thermometers at multiple locations.
- Temperature charts taped inside the door.
- Small fans or vents for air circulation in dead zones.
One prepper from Michigan summed it up best when we talked about storing food in out basement, “I don’t trust my basement, I measure it.”
Lesson #3: Don’t Overfill Your Space
Every prepper who’s been at it long enough has made this mistake, stacking buckets wall to wall, floor to ceiling, leaving no airflow or access. It looks impressive but invites trouble. Without space between shelves, condensation and heat build up in corners, and small leaks can spread unnoticed.
The pros keep at least 4-6 inches of clearance between walls and shelves, with narrow aisles for inspection and airflow. The basement should breathe, it’s a storage vault, not a bunker.
Lesson #4: Humidity Is the Silent Killer
Even when it’s not visible, moisture destroys slow and steady. One long-time friend from Missouri shared that he lost 200 pounds of rice over five years because he didn’t realize his sump pump area spiked humidity to 70% every summer.
Now he runs a dehumidifier on a smart plug, tracks readings weekly, and replaces silica packs annually. His takeaway: “If you don’t measure moisture, you’re gambling, not prepping.”
That’s why long term food storage in basement success depends on climate awareness. Dry air means security; damp air means danger.
Lesson #5: Store for the Diet You Actually Eat
It sounds simple, but many preppers fill their basements with foods they rarely cook. When a real emergency hits, suddenly you’re staring at a wall of wheat berries and no grinder. Experienced preppers say: store what you eat, and eat what you store.
This practice keeps rotation natural. You use items from your stockpile in daily meals, replace them with fresh ones, and keep the system alive, not static. That’s what long term food storage in basement is supposed to be: a living, breathing reserve that supports you now and later.
Lesson #6: Never Assume It’s Safe, Verify
 One pro trick: before relying on any stored food, test it. Open one container from each batch every few years. Check smell, color, and texture. If it looks fine but smells “flat,” oxidation might be starting. Adjust your storage or absorber ratios accordingly.
Preppers who treat their stockpile like a test lab rarely lose food unexpectedly. They experiment, learn, and adapt.
Lesson #7: Protect the Floor
Even dry basements occasionally “sweat.” Use pallets, PVC spacers, or modular racks to keep containers off the ground. A single flood or condensation event can soak cardboard boxes, rust cans, or compromise bucket seals. Simple elevation adds decades of protection.
Lesson #8: The Best System Is the One You’ll Maintain
There’s no single perfect layout, container, or method. Some preppers swear by Mylar and buckets; others prefer commercial freeze-dried tins. The key is consistency and attention. If your setup requires maintenance you won’t realistically do, it’s not sustainable.
Veterans plan around habit, easy labeling, clear paths, manageable loads, and steady tracking. That’s what makes a long term food storage in basement system truly durable: not its complexity, but its simplicity.
When you listen to preppers who’ve been doing this for decades, you’ll notice a common thread, calm confidence. They don’t worry about whether their supplies will hold up. They know because they’ve seen it work year after year.
That’s the level of control every prepper should aim for a basement that doesn’t just store food but proves itself reliable through time, rotation, and real-world testing.
Final Word: Your Basement Food Storage Is a Living System
At its core, long term food storage in basement isn’t about survival, it’s about stability. It’s about knowing that no matter what happens above ground, below your feet sits a quiet, dependable system that feeds you and the people you love.
Most new preppers see their basement as a bunker, a static fortress full of cans, buckets, and Mylar bags. But those who’ve been doing this for years understand something deeper: your basement isn’t a vault, it’s a living ecosystem. It changes with the seasons, reacts to humidity, and rewards attention. When you treat it like something alive, something that needs routine care, data, and discipline, it becomes one of the most powerful tools in your preparedness plan.
You can’t control the world outside. You can’t stop prices from rising, storms from hitting, or systems from failing. But you can control the environment under your own home. That’s where the real strength of long term food storage in basement shines, quiet, unshakable control.
It’s not glamorous work. You’ll spend hours labeling cans, sealing buckets, running dehumidifiers, and checking temperatures. You’ll rotate rice, log dates, and inspect seals that probably don’t need it. And yet, one night when the lights go out, or the grocery shelves empty, you’ll walk downstairs and realize something: that work you did was freedom.
Freedom from panic. Freedom from scarcity. Freedom from relying on systems that don’t care if you eat tomorrow.
That’s what long term food storage in basement truly represents, independence at its most practical level. Not fear-driven stockpiling, but a deliberate, disciplined act of self-reliance.
So, take care of that basement. Keep it dry, organized, and alive. Record what you learn, teach it to your family, and refine it as the years pass. Because food storage isn’t a one-time project, it’s a lifelong skill.
And the next time you step down those stairs and see rows of carefully packed containers waiting patiently in the dim light, you’ll understand what every seasoned prepper already knows: you didn’t just store food, you built security.
And if you missed the foundation of this process, the setup, layout, and environmental science, make sure to read: Long Term Food Storage in Basement (Part 1): Why It Works and How to Build It Right.
About the Author:
Rhonda Owen is a 60-year-old homesteader, off-grid gardener, and long-time contributor to PreppersWill. For over a decade, she has shared practical, no-nonsense advice on food preservation, self-sufficiency, and rural living. Living partially off-grid in the Ozarks, Rhonda grows, cans, and preserves nearly all her own food while mentoring families on how to build sustainable, long-term preparedness systems. Her writing blends hard-earned experience with tested survival principles you can trust.
Resources worth checking out:
What you should know about survival foods with decades of shelf life
The Foods that helped the pioneers survive crop failures and hard times
Survival Foods of the Native Americans
If you plan to build a storage room and equip it with everything needed > Start Here!