For centuries, Indigenous peoples of North America perfected how to make pemmican, a high-energy survival food that sustained them through brutal winters and long hunting expeditions. Made from dried meat, rendered fat, and occasionally berries, pemmican was the ultimate portable meal, lightweight, calorie-dense, and able to last for decades when properly stored. It was so vital that early explorers and fur traders depended on it as their main source of nourishment during expeditions into the harsh wilderness.
In today’s world, learning how to make pemmican has become an essential survival skill for preppers, off-grid homesteaders, and anyone serious about food security. Unlike most modern survival rations, pemmican doesn’t require refrigeration, freeze-drying, or vacuum sealing. Its simplicity is its power, just meat, fat, and sometimes fruit, yet it provides a perfect balance of protein, fat, and nutrients that can sustain you through emergencies, power outages, or months off-grid.
Historically, pemmican played a crucial role in trade and exploration across North America. The Cree, Métis, and other tribes produced it in massive quantities for the Hudson’s Bay Company, fueling explorers like David Thompson and Alexander Mackenzie. Today, the same method can be replicated in any modern kitchen with a dehydrator and basic ingredients. Learning how to make this ancient superfood connects us to centuries of proven self-reliance and offers a timeless, shelf-stable survival resource.
What is pemmican and why should it be of interest to you?
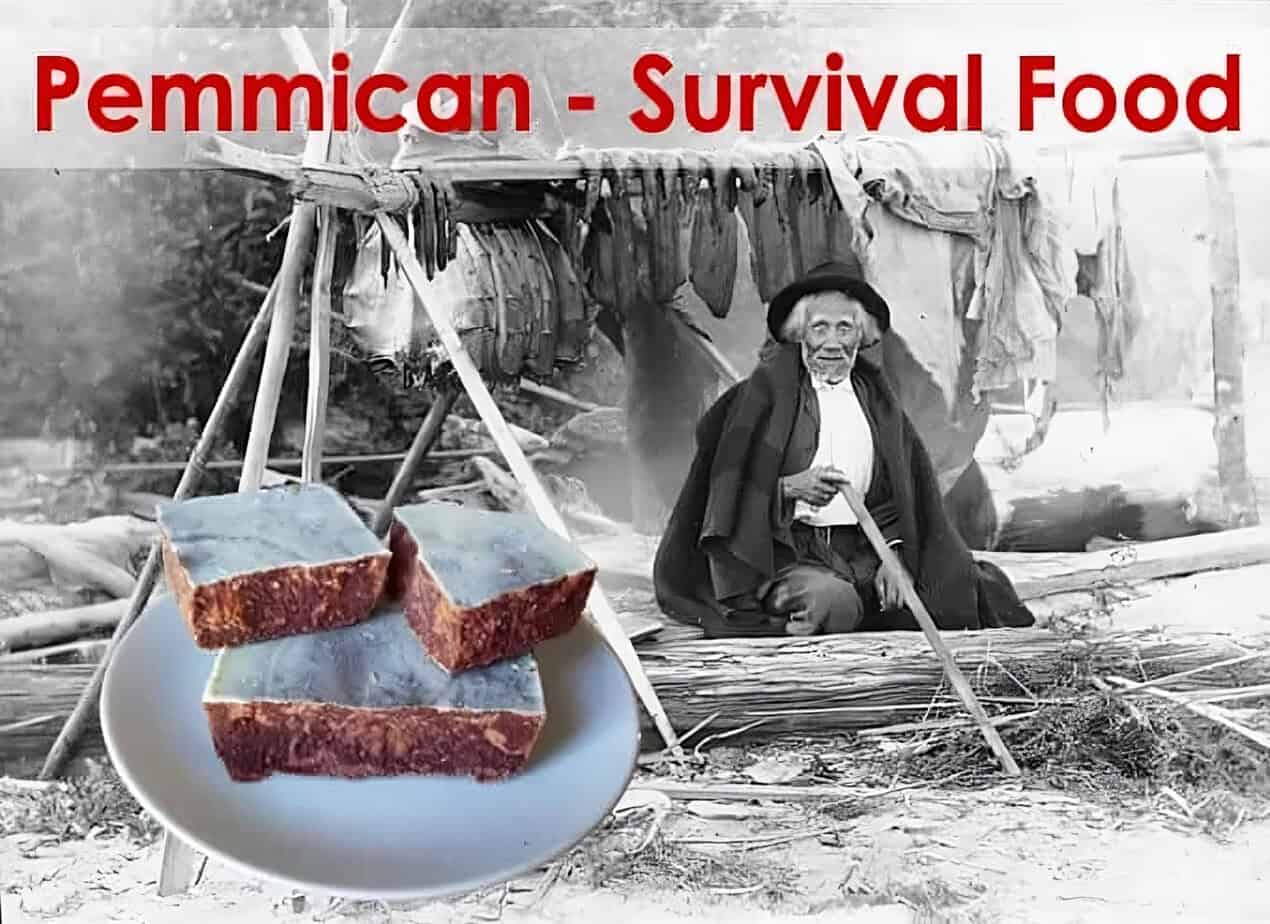
Pemmican is a nutritious, preserved food created by the women of Native American tribes. The term Pemmican is derived from pimii, the Cree-Chippewa word for fat. Pemmican consists of a mixture of cooked, dried and shredded buffalo meat, or fish, which is combined with melted fat. The food was tightly packed into a bag made of buffalo skin. It was used as a convenient type of long-lasting food.
In the old days, it was considered essential for sustaining warriors and hunters on the trail due to its content of proteins and vitamins. Pemmican can be eaten out of hand or added to soups, stews, or anything in need of an extra nutritional boost.
Besides assuring good health of the Native Americans, Pemmican was also considered a super-food due to its content of buffalo meat and the proprieties it was passing on. The warriors of the Indian tribes believed that if they ate pemmican, they would be strong and healthy as the mighty buffalo.
In today’s modern times, Pemmican is ideal for preppers because it is a high-energy, fast food that is easily transportable and long-lasting.
How to Make Pemmican Step by Step
Learning how to make pemmican step by step connects modern preppers to one of the oldest and most effective food preservation techniques in history. The process is simple but must be done carefully to ensure your pemmican lasts for years. Native tribes once sun-dried buffalo meat on racks over low fires; today, we can replicate the same process using ovens or dehydrators.
Start with lean red meat, beef, venison, or bison work best. Trim away every trace of fat, as any remaining moisture or grease can cause spoilage. Slice the meat thinly, about ¼ inch thick, and dry it completely. You can use a dehydrator set to 150°F or an oven on its lowest setting with the door slightly open. The meat should snap when bent, not bend or tear. Once dry, grind or pound it into a coarse powder.
Next, render clean animal fat (tallow) by slowly heating it until all water evaporates and only pure oil remains. Mix this melted tallow with the powdered meat in roughly a 1:1 ratio by weight. You can add crushed dried berries such as blueberries or cranberries for a touch of natural sweetness and vitamin C. Stir well until the mixture becomes uniform, then press it firmly into bars, muffin tins, or small pouches.
When cooled, the fat hardens and seals the meat from air and moisture, the key to pemmican’s legendary shelf life. Store your finished pemmican in airtight containers or waxed cloth in a cool, dry location. Properly prepared, it can remain edible for decades, providing a reliable, nutrient-dense emergency ration. For additional preservation safety and guidance on home dehydration, consult the USDA’s food safety guide.
Traditional Indian Pemmican Recipe
To truly understand how to make pemmican, it helps to return to the original method practiced by Native peoples long before refrigeration or metal cookware existed. For many tribes across the Great Plains, including the Cree, Métis, and Lakota, pemmican was more than food; it was survival itself. Every aspect of the process was refined over generations to ensure maximum shelf life and nourishment in some of the harshest climates on Earth.
Traditionally, pemmican was made from buffalo, elk, or deer, animals central to tribal life and the plains ecosystem. Hunters would strip the leanest cuts of meat from the animal and slice them into thin sheets. These were then laid across wooden racks and air-dried in the sun or lightly smoked over slow, smoldering fires. No salt or seasoning was added; the focus was complete dehydration to prevent decay. Once the meat was crisp and brittle, it was pounded with stone tools into a fine, fibrous powder.
Meanwhile, the hunters rendered the animal’s tallow, heating the purest fat from around the kidneys until it turned clear and fluid. When ready, the hot fat was poured over the powdered meat in a large hide or wooden trough and mixed by hand. Some tribes, particularly the Cree and Ojibwe, would add dried chokecherries or Saskatoon berries, crushed with their pits intact, to give the pemmican a tart flavor and additional nutrients.
The finished mixture was pressed into rawhide bags (called “parfleches”), sealed tightly with sinew, and stored in cool, shaded places. Properly made, this traditional pemmican could last for years, even in extreme weather. Early European fur traders who adopted it found that a small handful could sustain a man for an entire day of hard travel, a testament to the ingenuity and efficiency of Indigenous food preservation.
For deeper historical context on Native pemmican production and trade, see this detailed entry from the Canadian Encyclopedia.

Pemmican Balls: The Mountain Men’s Recipe
As the fur trade expanded across North America in the 18th and 19th centuries, mountain men and trappers adopted how to make pemmican from the Native tribes they traded with. Their lifestyle demanded durable, portable food that could survive the rugged wilderness and unpredictable weather of the Rockies. These frontiersmen adapted the traditional recipe into compact “pemmican balls”, small, high-energy portions that could be stored in pouches, eaten on the trail, or melted into stews at camp.
Unlike the large, rawhide-wrapped pemmican bags of Indigenous tradition, mountain men worked with what they had: tin cups, knives, and iron pots. They used dried buffalo, deer, or beef, pulverized it into fine shreds, and combined it with rendered tallow until it formed a dense, dough-like consistency. Some added dried currants or wild berries for flavor and nutrition. The mixture was then rolled into small, hand-sized balls that hardened as they cooled. A single pemmican ball could sustain a man for hours of hard work or travel.
How to Make Pemmican Balls
To replicate this frontier staple, start by preparing your dried meat and rendered fat as described in the earlier section on how to make pemmican. Mix equal parts powdered meat and tallow in a bowl while the fat is still warm. Stir thoroughly until the consistency is sticky but not runny. If desired, add a handful of crushed dried berries or a pinch of salt.
Once blended, scoop out small portions and roll them into balls about the size of a walnut. Set them on parchment or a clean wooden surface to cool. As the fat hardens, the balls will become firm and stable, perfect for long-term storage in jars, waxed cloth, or sealed tins.
Three Simple Methods for Making Pemmican Balls
Traditional Fire Drying: Roll the mixture into balls and place them on a rack near a small campfire. Let the smoke and heat lightly dry the exterior, forming a natural seal.
Oven Drying: In a modern kitchen, arrange the balls on a tray and warm them in the oven at 150°F for 30 minutes to ensure a moisture-free surface.
Dehydrator Finish: For ultimate shelf life, finish drying in a food dehydrator for 2-3 hours at low temperature. This step removes any residual humidity and helps the fat cure evenly.
Mountain men prized pemmican balls because they didn’t spoil easily, even on months-long expeditions. Packed with calories, protein, and fat, they offered sustained energy, proof that simple, traditional foods often outlast modern conveniences in both utility and reliability.
Pemmican Hunter’s Recipe
Hunters throughout North America perfected how to make pemmican long before refrigeration, coolers, or packaged rations existed. When far from camp or settlements, they relied on field-prepared pemmican as a dependable food source that required nothing but meat, fire, and patience. Whether tracking deer, elk, or moose, the principle remained the same: preserve the hunt immediately to prevent spoilage and capture every calorie possible.
Field-made pemmican was practical and quick. Hunters would slice thin strips of lean meat, suspend them over low coals, and let the slow, smoky heat dry the flesh completely. Once brittle, the meat was pounded between rocks or with a wooden mallet until it became a fine, fibrous meal. Rendered fat from the same animal, especially from around the kidneys or internal organs, was melted in a pan or tin cup over the fire. Equal parts meat powder and liquid fat were combined and stirred until a dense, oily mixture formed. This was pressed into small leather bags or pouches to cool and harden.
A single pouch could sustain a hunter for days, and many carried it as an emergency ration during long expeditions. Some even mixed pemmican into stews with wild roots or herbs to create a nourishing “trail soup.”
Ingredients for Hunter’s Pemmican
- 1 pound lean wild game (deer, elk, or moose preferred)
- 1 pound rendered animal fat (tallow or suet)
- Optional: handful of dried berries or crushed nuts for added vitamins
- Salt (only if immediate consumption is intended; otherwise omit to preserve longevity)
Step-by-Step Instructions for Hunter’s Pemmican
- Dry the meat: Slice the leanest cuts into thin strips and dry them over low fire heat or in the sun until completely brittle.
- Grind the meat: Use a rock, mortar, or even a smooth stick to pound it into fine shreds or powder.
- Render the fat: Melt tallow slowly until it becomes a clear, pure liquid.
- Combine: Mix equal parts fat and meat by weight in a small pot or bowl. Stir until evenly blended.
- Shape and store: Press into small pouches, wooden bowls, or cloth wraps. Once cooled, the mixture solidifies into a long-lasting, high-calorie ration.
Hunters valued this form of pemmican for its simplicity and its ability to survive weeks in a pack without spoilage. Even today, learning how to make pemmican like early hunters ensures you can preserve meat anywhere, from a remote wilderness hunt to a grid-down emergency.
For additional guidance on safe wild game processing, visit the University of Minnesota Extension’s resource.
Modern Pemmican Recipe for Preppers
Learning how to make pemmican with modern tools allows today’s preppers and homesteaders to enjoy the same long-term nutrition Native tribes and pioneers once relied on, only now with safer, cleaner, and more consistent results. Using dehydrators, food processors, and temperature control, you can replicate the ancient method while reducing spoilage risk and maintaining nutritional value.
Modern pemmican starts with the same core ingredients: lean red meat, rendered fat, and optional fruit. Beef, venison, or bison are still the top choices, though some preppers experiment with turkey or lamb. The goal remains the same, remove all moisture and fat from the meat before mixing. A food dehydrator set to 150°F will dry thin meat strips within 6-10 hours, ensuring a crisp texture that snaps easily. Once dried, grind the meat into a fine consistency using a food processor or mortar and pestle.
Next, gently melt pure beef tallow or suet until fully liquefied. Avoid overheating, as this can create smoky flavors or degrade the fat. Mix the meat powder and melted tallow at about a 1:1 ratio by weight, stirring until the mixture is smooth and slightly oily. For flavor and variety, you can add unsalted nuts, shredded coconut, or a spoonful of raw honey, though these reduce shelf life slightly.
Press the mixture into parchment-lined pans, silicone molds, or muffin trays, then let it cool and harden. Once solid, cut into bars or squares. For long-term storage, vacuum-seal your pemmican and keep it in a cool, dark place. Properly made and stored, modern pemmican can last 10 years or more, a compact, nutrient-rich meal ready for any emergency or expedition.

Ingredients for Modern Pemmican
- 1 pound lean beef, venison, or bison (completely dried)
- 1 pound rendered beef tallow or suet
- Optional: dried cranberries, nuts, or 1 tbsp raw honey
- Optional: a pinch of sea salt for taste (omit for maximum shelf life)
Step-by-Step Instructions for Modern Pemmican
- Dry the meat: Slice thin and dehydrate until brittle.
- Grind the meat: Use a food processor or blender until fine.
- Render the fat: Melt tallow on low heat until liquid and clear.
- Combine: Stir meat powder into melted fat, adding any optional ingredients.
- Shape and store: Pour into molds, cool, then seal for long-term use.
Once complete, your pemmican should feel firm but slightly pliable, never crumbly or greasy. If stored properly, it can remain edible for years, making it one of the few homemade survival foods that truly earns the title of “superfood.”
Vegan Pemmican Recipe
While traditional pemmican relies on meat and tallow, modern preppers exploring how to make pemmican can also create a plant-based version that mimics its nutrition and durability. Vegan pemmican focuses on the same principles, high energy density, long shelf life, and balanced nutrition, but uses ingredients that provide protein, healthy fats, and natural sugars without animal products.
This adaptation isn’t just for vegans; it’s an excellent backup option for anyone wanting a sustainable, non-perishable survival food when hunting or livestock fat isn’t available. Using nuts, seeds, and dried fruits, you can produce a shelf-stable, calorie-rich bar that fuels you in emergencies just like traditional pemmican.
Vegan Pemmican Ingredients
- 1 cup mixed nuts (almonds, walnuts, or cashews)
- ½ cup sunflower or pumpkin seeds
- ½ cup dried fruit (cranberries, raisins, or apricots)
- ¼ cup coconut oil or nut butter (for fat content)
- 1 tablespoon chia or flaxseed meal (for binding and nutrients)
- Optional: 1 tablespoon maple syrup or honey (omit for stricter vegan version)
- Pinch of sea salt
Step-by-Step Instructions for Vegan Pemmican
- Grind the base: In a food processor, blend the nuts and seeds until they form a coarse flour.
- Add dried fruit: Pulse until the fruit is chopped and evenly mixed.
- Incorporate the fat: Add coconut oil or nut butter and blend until the mixture becomes sticky.
- Add binders: Stir in chia or flaxseed meal to help the mixture hold together.
- Form and store: Press firmly into molds or shape by hand into bars or balls. Refrigerate or air-dry in a cool area until solid.
Vegan pemmican isn’t identical to the meat-based original, but it shares its spirit, a compact, portable food designed to endure time and travel. When stored in sealed containers away from heat, it can last several months and offers an ideal option for hikers, vegans, or anyone diversifying their emergency pantry.
Tips for Making Good Pemmican
Even if you know how to make pemmican, mastering the finer details is what ensures your batch lasts for years instead of months. Pemmican’s strength lies in its simplicity, meat, fat, and sometimes berries, but that simplicity depends on precision. A single mistake, such as leaving trace moisture or using poorly rendered fat, can shorten its shelf life dramatically.
Start by drying your meat completely. This is the most critical step. Whether you use an oven, dehydrator, or open-air rack, the meat should break or snap cleanly when bent. Any flexibility means moisture remains, and moisture means bacteria. Similarly, use pure rendered fat (tallow), not butter, lard, or unrefined suet. Tallow forms a solid, protective coating around the meat fibers and seals out air and moisture, which is why properly made pemmican can last for decades.
Cleanliness is also vital. Always handle ingredients with washed hands and sterilized tools. Avoid plastic containers for long-term storage, as they can trap moisture or leach chemicals. Instead, use glass jars, waxed cloth, or metal tins kept in a cool, dark place.
Be cautious with additives. Fruits, nuts, and honey make pemmican tastier but reduce its longevity because of their natural sugars and moisture. If you do make “sweet” pemmican, consume those batches first and save the pure meat-and-fat version for long-term storage.
Finally, label and rotate your stock like any other emergency food supply. Note the date made and inspect periodically for rancid smells or discoloration. When properly prepared, pemmican remains one of the most durable and nutritionally complete survival foods ever devised, a true testament to self-reliant living.
For official guidance on food preservation and avoiding spoilage in stored foods, see the CDC’s recommendations.
Final Advice on How to Make Pemmican
Learning how to make pemmican isn’t just about food preparation, it’s about reviving an ancient skill that represents true self-reliance. The process is simple, but success depends on discipline, patience, and precision. Whether you’re following the methods of Indigenous hunters, mountain men, or modern preppers, the key principles remain unchanged: use lean meat, pure fat, and remove every trace of moisture.
Pemmican stands apart from other survival foods because of its balance of nutrition, portability, and longevity. While canned goods and freeze-dried meals eventually expire, pemmican can last for decades if made and stored correctly. It provides complete sustenance, protein for strength, fat for endurance, and optional fruit for vitamins, all without refrigeration or complex technology.
If you’re new to prepping or wilderness survival, don’t wait for an emergency to learn this skill. Practice now, experiment with different meats and fats, and document your process. Each batch teaches you something new about texture, taste, and storage. Once you master it, you’ll possess a timeless tool for survival, one that has sustained entire cultures and expeditions through centuries of hardship.
In a world increasingly dependent on fragile supply chains, knowing how to make pemmican remains one of the most valuable preparedness skills you can learn. It’s simple, powerful, and proven by history, exactly what self-reliant living is all about.
Author Bio:
Bob Rodgers is a lifelong outdoorsman, herbalist, and seasoned prepper with over 20 years of real-world survival experience. As the founder of PreppersWill.com, he shares practical advice on self-reliance, off-grid living, and disaster preparedness, no hype, just hard-earned lessons from decades of hands-on prepping.
Last updated on: November 3, 2025
Survival and Preparedness resources:
Survival Foods that stood the test of time
What You Should Know About Emergency Survival Foods With Decades Of Shelf Life
Survival Foods of the Native Americans
A DIY project to extract moisture from air and have clean water
Where can you get bison?? or Buffalo meat?
It depends on where you live, but you can try on Amazon.
Never heard of Pemmican but now I’m interested because of the way the pre-election is going. Pemmican would be good to have as a backup is things really go south and food markets go empty. Now is the time to prepare
I made mine using Beef for the Jerky, I us Ground Beef ‘ Lean ‘, I mix dry jerky mix with 1/4 cup water, after dissolved pour onto about 2 lb Lean Ground Beef, MIX THOROUGHLY. I make balls and flatten them to make my Jerky, Dehydrate. I then used this articular to make Pemmican.