If you’ve ever stood in your basement and thought, “This could be my backup pantry if things ever went sideways,” you’re already thinking like a seasoned prepper. For decades, basements have been the quiet stronghold of food security in American homes, cool, dark, and out of the way.
Done right, long term food storage in basement setups can preserve grains, beans, and canned goods for decades. Done wrong, that same space can quietly destroy hundreds of pounds of supplies before you even realize it.
This guide, Part 1 of a two-part series, is about building your foundation the smart way. You’ll learn the science that makes basements ideal (and sometimes dangerous), how temperature and humidity affect shelf life, and how to design a layout that protects your food from time itself. We’ll go step by step through what to store, what to skip, and how to keep everything dry and stable for the long haul.
In Part 2, we’ll move beyond setup and talk about maintenance, pest defense, redundancy planning, and expert-level rotation systems, the advanced habits that turn a basement stockpile into a self-sustaining prepper fortress. But before you get there, let’s make sure your foundation, the physical space, structure, and environment, is rock solid.
1. Long Term Food Storage in Basement: Why It’s Smart but Not Foolproof
At first glance, the basement feels like the perfect hideaway for your food supply, cool, dark, and out of sight. And in many cases, that’s true. The typical U.S. basement maintains a lower average temperature than the rest of the home, usually hovering between 50°F and 65°F, an excellent range for extending shelf life. That’s one of the main reasons long term food storage in basement setups have become a cornerstone of serious prepping.
Cool temperatures slow down chemical reactions that cause food to deteriorate. Darkness keeps light-sensitive nutrients, especially vitamins A and D, from breaking down. And being underground naturally buffers against temperature swings caused by outdoor weather changes. On paper, it all adds up to a prepper’s dream.
But here’s the catch, the same characteristics that make a basement great for storage can also make it risky. Underground spaces are prone to excess humidity, condensation, and poor airflow. All of that can create a breeding ground for mold and corrosion, which means even sealed cans or jars aren’t entirely safe if moisture levels get out of hand. A single leak, flood, or unnoticed pipe drip can destroy months of careful work.
That’s why long term food storage in basement needs to be treated as a system, not just a storage room. Temperature stability, moisture control, and pest prevention are the “big three” that determine whether your supplies last 5 years or 25.
Even in newer, finished basements, the building materials themselves can influence performance. Bare concrete floors wick moisture from the ground, while insulated or painted concrete slows it down. Wooden shelving can absorb dampness, inviting mildew or insects, while metal racks resist it but can rust if humidity gets too high. Every decision, from shelf height to wall insulation, affects how long your food lasts.
Veteran preppers often say that basement food storage is about balance. The goal isn’t perfection, it’s control. Keeping the environment predictable means less stress on your stockpile and more consistency in your rotation schedule. A steady 55°F and 40% humidity might not sound exciting, but those numbers can mean the difference between rice lasting ten years or twenty.
And while the basement gives you space to stock deep, it shouldn’t hold everything you own. No matter how carefully managed, long term food storage in basement setups are still vulnerable to localized issues, a sump pump failure, pest intrusion, or structural leak. The most prepared families diversify: part in the basement, part in a pantry, and part in sealed containers elsewhere on the property.
In short, the basement can be the heart of your food security, but only if you treat it with the same respect you give your generator or your water supply. It’s not a “set it and forget it” system but rather a living part of your long-term preparedness plan.
2. Understanding the Science Behind Long Term Food Storage in Basement Conditions
When it comes to long term food storage in basement setups, the real magic isn’t in how much you store, it’s in understanding what your food is quietly enduring down there. Food doesn’t spoil overnight. It breaks down slowly through predictable chemical processes that depend on temperature, humidity, oxygen exposure, and light. Once you grasp those relationships, you can make your basement work for you instead of against you.
Let’s start with temperature, the number one factor in food longevity. The USDA Food Safety and Inspection Service and Utah State University Extension both highlight the same principle: every 10°F increase in storage temperature roughly cuts a food’s shelf life in half. So, if your rice might last 20 years at 55°F, that drops to about 10 years at 65°F and just 5 years at 75°F. That’s why serious preppers prize a basement that holds steady in the 50°F to 60°F range year-round.
Humidity is the silent killer in many long term food storage in basement projects. Once relative humidity climbs past 60%, you risk condensation on cans and buckets, and with it, rust, mold, and label decay. Below 30%, on the other hand, some dehydrated foods can start losing quality faster as the packaging materials dry out and crack. The sweet spot is between 35% and 50% humidity, which keeps most dry goods stable without inviting moisture.
Even the air itself can become an issue. Basements tend to have limited airflow, and still air allows heat and humidity pockets to form. That’s why ventilation or at least small, powered fans are worth their weight in gold. A gentle air current keeps temperature distribution even and prevents “dead corners”, areas that trap warm, humid air behind storage racks.
Lighting matters, too. Direct sunlight or even fluorescent bulbs can degrade vitamins and fats over time, especially in transparent containers. The rule is simple: dark is best. That’s why most preppers store long-term items like grains and beans in opaque Mylar or food-grade buckets with tight lids.
If you want to take things a step further, a small digital hygrometer and thermometer combo can give you a constant reading of your basement’s environment. Some preppers even go as far as logging their conditions seasonally, noting how the climate shifts through the year. That kind of data-driven awareness turns “guesswork storage” into a professional-grade setup.
Here’s an example of what this science looks like in practice:

By controlling these environmental factors, you essentially “freeze” time on your food. The nutrients, texture, and taste all remain closer to their original state. And while no setup is perfect, every step you take toward stabilizing temperature and humidity compounds your results over years of storage.
This is where long term food storage in basement stops being a casual prepper project and becomes a science-backed strategy. When your basement environment stays predictable, your food rotation becomes easier, your waste drops to near zero, and your peace of mind skyrockets.
3. How to Set Up Your Basement for Long Term Food Storage That Lasts
Designing a long term food storage in basement system isn’t about how much food you can cram into a corner, it’s about creating a controlled environment where time moves slower for your supplies. A well-planned layout doesn’t just make access easier; it actively helps preserve your food’s quality by promoting stability, airflow, and safety.
Think of your basement as a living ecosystem. Everything down there, concrete, insulation, shelves, even paint, affects temperature and humidity flow. Before you bring in the buckets and cans, take time to prep the space itself.
Start with the foundation
Inspect your walls and floors for cracks, leaks, or efflorescence (that white powdery residue that signals moisture seepage). Seal those areas with a vapor-permeable masonry sealer, it stops water intrusion without trapping moisture inside the concrete. Avoid vinyl or latex wall coatings that can peel over time; instead, go for professional-grade sealants like Drylok Extreme or RadonSeal.
For floors, a basic epoxy sealant works wonders. It resists water vapor and keeps your shelving more stable during seasonal humidity swings. If flooding is even a remote concern, consider installing a sump pump or raising your storage platform a few inches off the floor.
Shelving: metal beats wood
Wooden shelves might look rustic, but they absorb moisture and can harbor mold or insects. Powder-coated steel or chrome wire shelving performs far better for long term food storage in basement conditions. It’s sturdy, easy to clean, and resistant to pests. Keep shelving units at least 2 inches away from walls and 4-6 inches off the floor to allow airflow and prevent condensation buildup.
If your basement tends to sweat during summer, line the walls behind your shelves with rigid foam insulation boards. These not only stabilize temperature but also act as a buffer between cold concrete and warm air, minimizing condensation, which is a quiet destroyer of labels and metal cans.
Zone your basement like a prepper pro:
- Divide your storage area into zones based on temperature sensitivity and access frequency:
- Dry goods zone: rice, beans, grains, and baking supplies in Mylar bags or sealed buckets.
- Canned goods zone: commercially canned meats, soups, and veggies stored on metal racks.
- Freeze-dried/dehydrated zone: lightweight, long-term items stored in airtight containers.
- Short-term rotation zone: items used weekly or monthly; keep these closest to the entrance.
This zoning method ensures that air circulates properly and you’re not disturbing deep storage items every time you grab a can of chili.
Airflow and lighting
Even a small USB-powered fan or low-energy ventilation unit can dramatically improve air consistency in your basement. Set fans on a timer to run a few hours each day during humid months. As for lighting, stick with LEDs, they generate minimal heat and won’t accelerate spoilage. Keep them off when not in use.
Add environmental monitors
A simple digital hygrometer/thermometer combo mounted near your food zones provides real-time readings. The best preppers log those numbers monthly and adjust humidity control devices (like Eva-Dry dehumidifiers or silica packs) as needed. Over time, you’ll learn how your basement “breathes” through the seasons, an insight that separates casual storage from expert-level long term food storage in basement management.
Don’t forget safety and access
Label aisles, leave walk space, and keep heavier containers at waist height to avoid strain. Store emergency lighting and basic tools (like a moisture meter, flashlight, and spare seals) nearby. A clean, organized storage space is faster to inventory and safer during power outages or emergencies.
Once you’ve built a stable, sealed, and well-ventilated environment, your basement stops being just a room and becomes a controlled food vault. You’ll immediately notice the difference, no musty odors, no sweating jars, no rusting lids. Just quiet, predictable consistency.
That’s the goal. Long term food storage in basement isn’t just about bulk food, it’s about environmental control, efficiency, and peace of mind.

4. Best Foods for Long Term Food Storage in Basement Environments
The biggest mistake people make when starting long term food storage in basement projects isn’t poor sealing or weak shelving, it’s choosing the wrong foods. Not everything that’s shelf-stable thrives in a basement. Temperature fluctuations, humidity, and packaging all influence whether something will quietly last for decades or quietly spoil behind a bucket of rice.
Let’s start with the staples that consistently prove their worth under basement storage conditions, the foods that have stood the test of time for preppers, homesteaders, and even pioneers before refrigeration existed.
The Foundation Foods
These are your long-term workhorses, calorie-dense, versatile, and extremely durable when packaged correctly.
Rice (white, jasmine, basmati): When stored at 55°F in Mylar bags with oxygen absorbers, white rice can last 25-30 years. Avoid brown rice, the natural oils in the bran layer cause it to turn rancid within 6-12 months, even in cool basements.
Dry beans and lentils: Properly sealed in Mylar with desiccants, they can last 20-25 years. They may take longer to soften when cooked after the 10-year mark but remain safe and nutritious.
Wheat berries: Whole wheat stored in food-grade buckets stays viable for 30+ years in basement temperatures. Ground flour, however, lasts only about 1-2 years.
Rolled oats: Ideal for basements with a 20-year lifespan when sealed airtight and kept dry. Quick oats degrade faster due to more surface exposure.
Pasta: Dry pasta lasts up to 25 years in airtight containers. Keep it away from moisture, even a small leak can turn it into a gluey mess.
Canned and Jarred Foods
Canned goods are a cornerstone of long term food storage in basement plans because they’re sealed, stackable, and resistant to pests. But even cans have vulnerabilities. The USDA recommends storing canned foods below 85°F (ideally around 55°F-65°F). Basements fit that bill nicely, but watch for rust, the main enemy of metal packaging.
Store these confidently:
- Commercial canned meats (tuna, chicken, Spam, beef stew)
- Soups and chili
- Vegetables and fruits in water or syrup
- Tomato products (only if rotation is consistent, acidity shortens shelf life to 18-24 months)
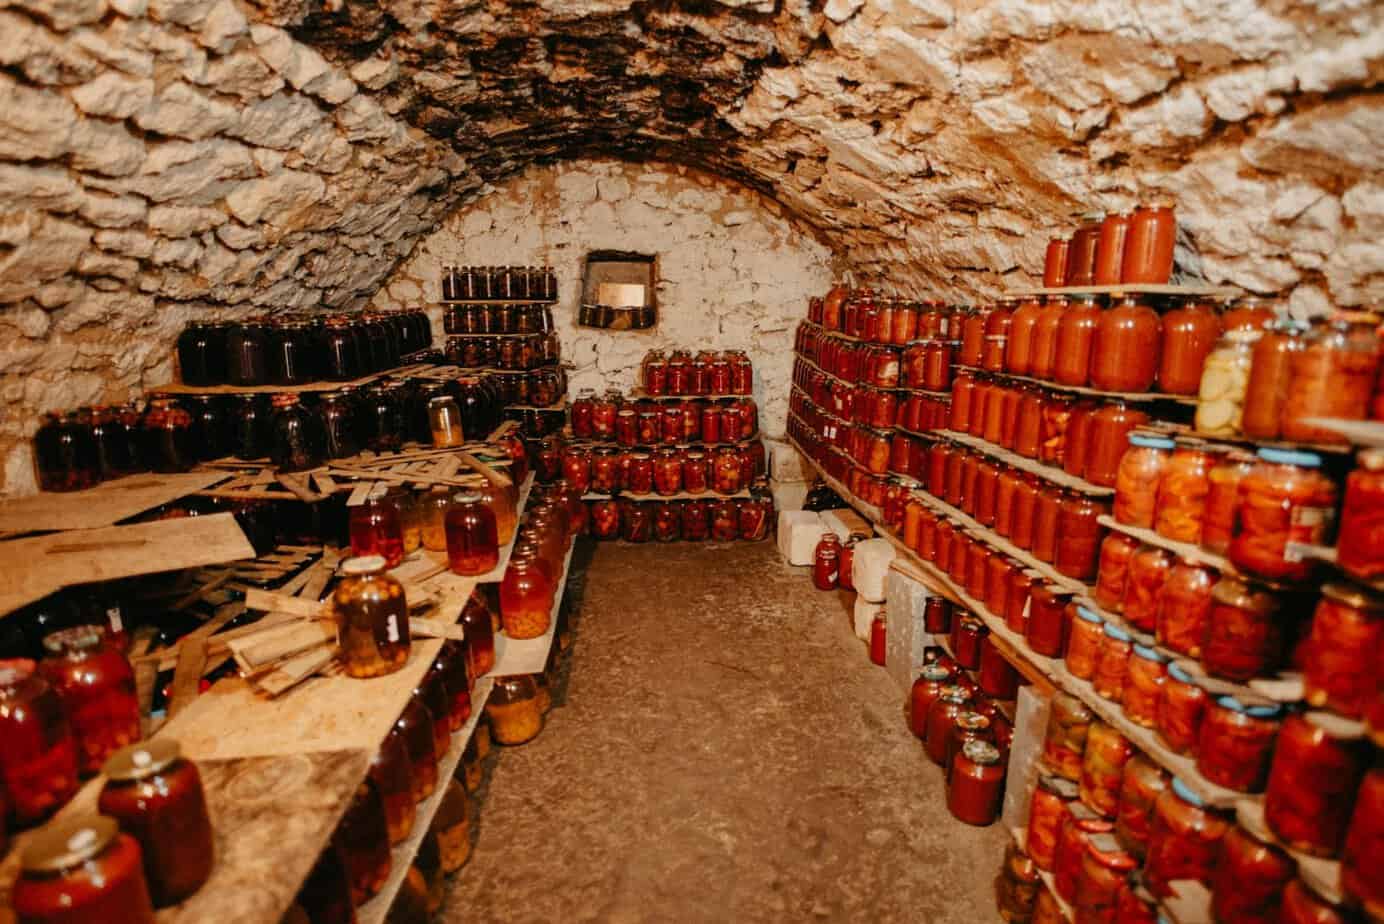
Glass jars, whether store-bought or home-canned, need a bit more care. Keep them in sturdy boxes or padded crates to avoid temperature-shock cracks. Label lids with both date and contents, condensation can cause ink to fade over time.
Sugars, Salts, and Sweeteners
These items are almost immortal if stored dry and sealed:
- Sugar, salt, and honey never spoil. Even if honey crystallizes, you can gently warm it to restore texture.
- Molasses lasts 5-10 years unopened but should be rotated every few years due to oxidation.
These “forever foods” are especially suited to long term food storage in basement because they’re naturally resistant to microbial growth.
Freeze-Dried and Dehydrated Foods
Modern preppers often rely on freeze-dried meals and ingredients, which are engineered for 25-30-year shelf lives under proper storage. The basement’s stable temperature helps immensely, but moisture control remains critical. Keep these in factory-sealed pouches or secondary plastic tubs with silica packs.
Dehydrated foods (fruits, jerky, vegetables) are trickier. They should be packed with oxygen absorbers and stored at below 60°F for best results. Homemade dehydrated goods typically last 5-10 years in basement environments if vacuum-sealed.
Foods to Avoid for Long Term Basement Storage
Some foods simply don’t belong in your basement for the long haul, no matter how well you package them.
- High-fat foods (nuts, brown rice, whole-grain flours), fats go rancid even in cool basements.
- Powdered dairy, hygroscopic (absorbs moisture) and short-lived unless in factory-sealed cans with nitrogen flushing.
- Soft packaged snacks (chips, crackers, cookies), packaging degrades quickly.
- Oils, even sealed cooking oils oxidize over time; store smaller bottles and rotate often.
Light Gear Mentions
You don’t need a commercial freeze dryer to succeed with long term food storage in basement. A few inexpensive tools make all the difference:
- Mylar bags (5-7 mil thick): best protection against oxygen and moisture.
- Oxygen absorbers (300–2000cc): prevent insect survival and oxidation.
- Food-grade buckets with gamma lids: easy access and resealability.
- Desiccant packs: control residual humidity inside containers.
You can find these through trusted suppliers or Amazon vendors that specialize in prepper storage materials. The key is not the brand, it’s consistency. If every bucket, bag, and seal in your basement follows the same system, you’ll spot problems instantly and maintain airtight control over your stockpile.
When you match the right food to the right environment, your long term food storage in basement setup transforms from guesswork into a dependable, science-based safeguard. Every choice, from rice to beans to metal cans, becomes part of a balanced ecosystem that quietly guards your family’s nutrition through any crisis or supply disruption.
5. Managing Moisture: Keeping Long Term Food Storage in Basement Dry and Safe
If temperature is the heart of long term food storage in basement success, humidity is the bloodstream, and it can either nourish your system or quietly destroy it. Moisture is insidious; it sneaks in through concrete pores, foundation cracks, and even the air you breathe down there. You might not see it or feel it, but your food sure does. Rusted cans, moldy cardboard, soft bucket lids, and clumpy sugar are all symptoms of one thing: a basement that’s too damp.
So, how do you keep your basement food storage dry and safe year-round? The secret lies in moisture control, not moisture elimination. A completely dry environment is neither realistic nor desirable. The goal is to keep relative humidity between 35% and 50%, which preserves food quality and prevents microbial growth while keeping packaging stable.
Identify the Moisture Sources First
Every basement has a unique “moisture fingerprint.” Some pull dampness from the ground through unsealed floors. Others leak from foundation cracks, window wells, or plumbing joints. In humid regions, the air itself carries excess moisture that seeps into every corner. Before setting up your racks, spend a week monitoring humidity levels with a digital hygrometer at different times of day and in various spots. This simple test often reveals hidden trouble areas.
If humidity spikes after rain, it’s a groundwater issue. If it fluctuates with indoor activity or temperature swings, it’s likely ventilation or condensation. Knowing the cause tells you which fix works best.
Seal and Shield
Concrete may look solid, but it’s porous. The first step in any long term food storage in basement setup is sealing every surface. Apply a vapor-permeable sealer (like Siloxa-Tek or PROSOCO) to both walls and floors. This helps block liquid water while still allowing trapped moisture to evaporate outward instead of inward.
Next, protect your storage itself. Place heavy-duty plastic sheeting or vapor barriers under shelving units to block ground moisture. Raise your shelves a few inches off the floor using bricks or PVC tiles, even a half inch can prevent water wicking during minor leaks or condensation pooling.
Control the Air, Control the Water
Once your surfaces are sealed, manage the air. A dehumidifier is your best ally for long term food storage in basement environments. Choose one with an automatic humidity control setting and continuous drain hose so you never have to babysit the tank. Models from Frigidaire, hOmeLabs, or Midea perform reliably in prepper basements across the U.S.
If you live in a humid state (think Missouri, Tennessee, or the Carolinas), consider running the dehumidifier from April through October. In dry regions or during winter, it can usually stay off. Keep a small fan circulating near the storage area, gentle airflow prevents “stagnant air zones” where condensation tends to form behind buckets and cans.
For micro-level protection, add silica gel packs or desiccant canisters inside your storage containers. These act as your last line of defense, soaking up residual moisture that sneaks past your seals. Replace them every 12-18 months or whenever they change color (many are color-indicating for this reason).
Plan for Flooding and Emergencies
 Even the best-sealed basements can flood, burst pipes, sump pump failures, or extreme rain can undo years of careful prepping. Build redundancy into your long term food storage in basement plan by:
- Keeping high-value foods (like freeze-dried meals) in waterproof bins or rubber-sealed totes.
- Elevating shelving at least 6 inches off the ground, not 2-3.
- Storing duplicates of essentials in a second-floor closet, garage, or offsite cache.
Some preppers even install moisture alarms, inexpensive battery-powered sensors that alert you via phone app if water touches the floor. It’s a small investment that can save thousands in food loss.
The Seasonal Check Routine
Once your system is set up, treat moisture control like you would any other prepper maintenance. Each season, do a quick inspection:
- Check for condensation behind shelves or on metal lids.
- Test the dehumidifier and empty the filter.
- Look for rust, swelling, or musty smells, early warning signs of trouble.
- Record humidity and temperature readings. Over time, you’ll spot patterns and can adjust your gear accordingly.
Moisture is relentless, but it’s predictable. With the right tools and vigilance, you can turn even a humid, flood-prone basement into a stable environment where food lasts decades. A prepper who understands humidity is one who keeps their supplies, and their confidence, intact. That’s the quiet science behind every reliable long term food storage in basement system.
Concluding
When your basement is sealed, organized, and climate-stable, you’ve done more than store food, you’ve built the backbone of your self-reliance. You’ve created a controlled environment where calories, nutrients, and peace of mind can quietly outlast chaos above ground.
But setup is only the beginning. Even the best long term food storage in basement system will eventually face new challenges, oxidation, moisture creep, pest activity, or simple neglect. That’s where discipline and maintenance come in.
In Part 2, we’ll go beyond setup and dive into the real craft of long-term storage longevity, how to rotate and inspect food, defend against pests and mold, build redundancy, and maintain your system year after year without wasting time or money.
Your basement is ready. Now it’s time to make it endure.
About the Author:
Rhonda Owen is a 60-year-old homesteader, off-grid gardener, and long-time contributor to PreppersWill. For over a decade, she has shared practical, no-nonsense advice on food preservation, self-sufficiency, and rural living. Living partially off-grid in the Ozarks, Rhonda grows, cans, and preserves nearly all her own food while mentoring families on how to build sustainable, long-term preparedness systems. Her writing blends hard-earned experience with tested survival principles you can trust.
Resources worth checking out:
What you should know about survival foods with decades of shelf life
The Foods that helped the pioneers survive crop failures and hard times
Survival Foods of the Native Americans
If you plan to build a storage room and equip it with everything needed > Start Here!