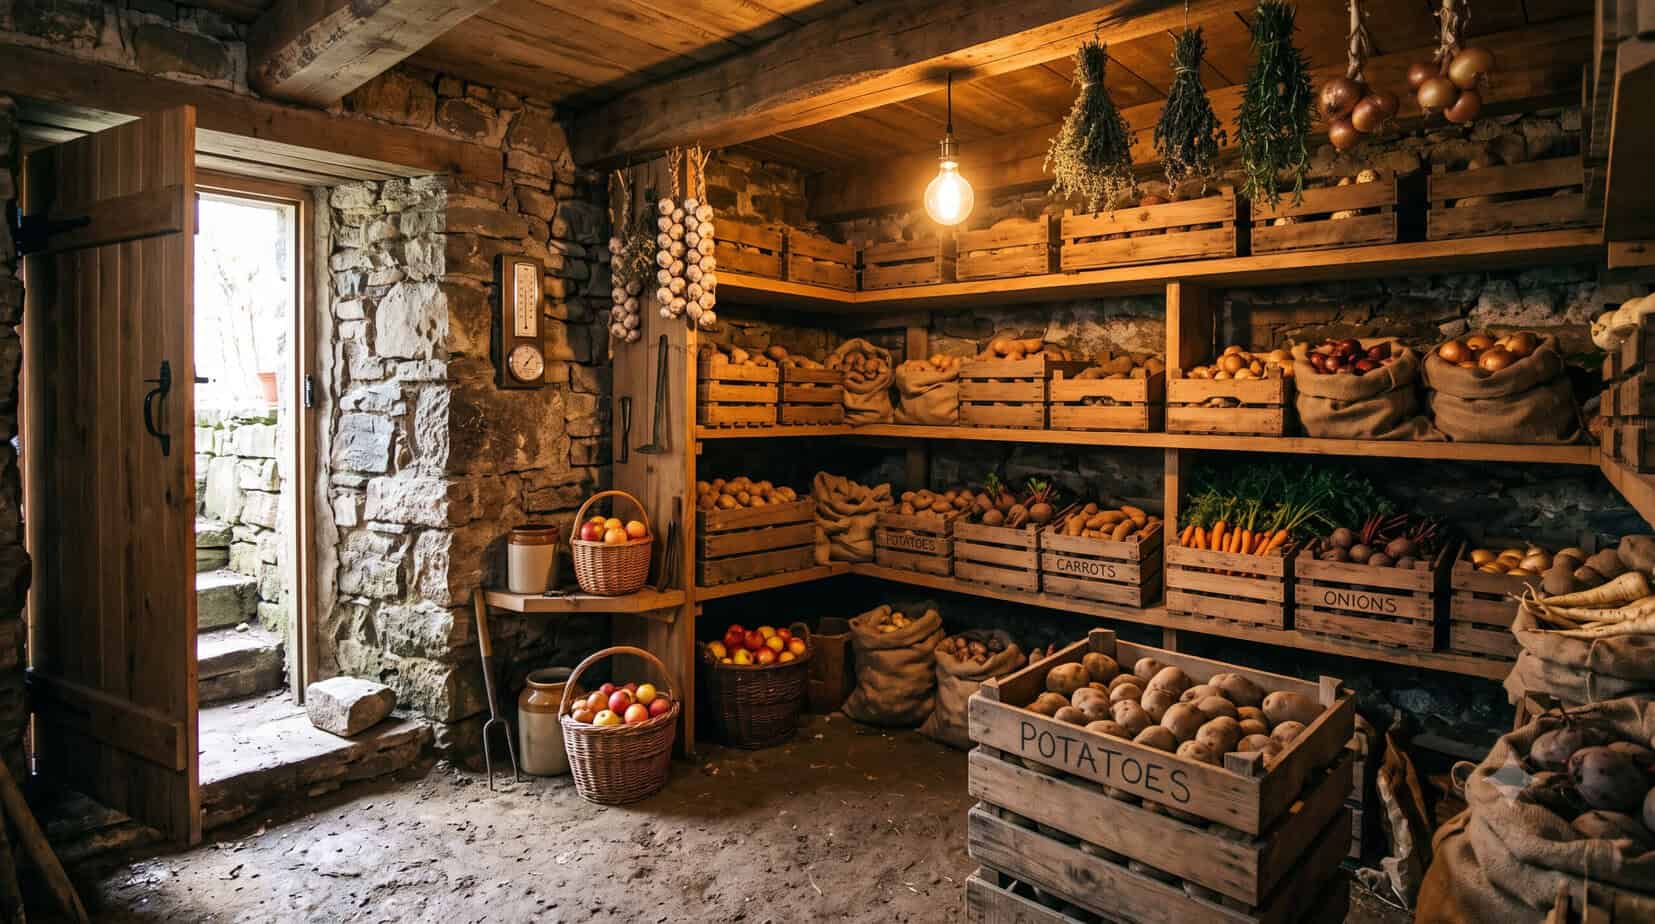
Anyone who has opened a root cellar door in January and found a bin of soft, weeping potatoes or a shelf of shriveled carrots knows the disappointment firsthand. The vegetables looked fine in October. By midwinter they had turned to mush, sprouted in the dark, or dried out until they were barely edible.
In almost every case, the culprit was not bad luck or bad seed stock. It was a mismatch between what was actually happening inside the storage space and the root cellar temperature and humidity requirements that different crops need to survive the winter intact.
A root cellar is a deceptively simple idea. Dig into the earth, take advantage of the ground’s natural insulation, and you get a space that stays cool without electricity and holds enough moisture to keep produce from turning leathery. But simple does not mean automatic.
Temperature that swings ten or fifteen degrees between day and night, humidity that drops because of a concrete floor, or a ventilation system that never gets adjusted for the season will quietly undo months of gardening work.
Understanding the actual numbers, and the reasoning behind them, is what separates a root cellar that saves real grocery money from one that becomes an expensive science experiment in mold.
This article walks through what causes food to break down in storage, what temperature and humidity ranges different crops actually need, and how to build and manage a space that meets those conditions reliably through an entire winter, regardless of where you live or what kind of structure you are working with.
What Are Root Cellar Temperature and Humidity Requirements, Exactly?
Before getting into troubleshooting, it helps to define the target. Most root crops, including potatoes, carrots, beets, turnips, and rutabagas, keep best somewhere between 32 and 40 degrees Fahrenheit with relative humidity sitting between 85 and 95 percent. That is genuinely cold, just above freezing, and genuinely damp, close to the saturation point of the air.
Apples and pears want similar cold but slightly less moisture, while onions, garlic, and winter squash flip the equation entirely and prefer a warmer, drier space in the range of 45 to 60 degrees with humidity closer to 60 to 70 percent, according to the University of Missouri.
The reason these root cellar temperature and humidity requirements vary so much by crop comes down to the biology of the vegetable itself. A potato is still a living tuber after harvest, breathing slowly and using stored starch for energy. Slow that respiration down with cold and the tuber lasts for months. Speed it up with warmth and it sprouts within weeks. Onions and garlic, on the other hand, are prone to rot rather than sprouting when kept too wet, so they need airflow and dryness instead of humidity.
The practical takeaway is that a single root cellar rarely serves every crop equally well unless it is zoned. Most homesteaders solve this by grouping produce on different shelves, with the coldest, dampest area near the floor for roots and a warmer, airier spot near the entrance or upper shelves for squash and alliums.
Why Food Rots: The Science Behind Spoilage in Storage
Rot is not a single process. It is really three separate mechanisms working together, and each one responds differently to temperature and moisture. The first is respiration, the ongoing metabolic activity of the vegetable itself, which consumes sugars and starches and releases heat, carbon dioxide, and water vapor. Warmer storage temperatures accelerate respiration dramatically, which is why a bag of carrots left on a kitchen counter goes soft in days while the same carrots in a proper root cellar last for months.
The second mechanism is microbial growth. Bacteria and fungi are present on virtually all fresh produce, and they thrive in the same moderate temperature range that humans find comfortable. Cold storage slows their reproduction to a crawl, which is one of the central reasons root cellar temperature and humidity requirements lean so heavily toward the low end of the safe range without dipping into freezing territory.
The third mechanism, moisture loss, works in the opposite direction from the first two. Vegetables are mostly water, and in a dry environment they lose that water through evaporation, becoming limp, wrinkled, and eventually unusable even though they were never technically contaminated by bacteria or mold. This is why humidity control matters just as much as temperature control. A cellar that is cold enough to stop respiration but too dry will still ruin a harvest, just through desiccation instead of decay.
Understanding these three forces helps explain why generic advice like keep it cold falls short. Cold without humidity dries out the crop. Humidity without cold speeds up decay. Getting both variables right at the same time is the entire game, and it is a game that plays out slowly, over weeks and months, rather than in a single dramatic failure you can catch and fix on the spot.
There is also a fourth factor worth mentioning, mechanical damage. A bruised or nicked potato or carrot has broken through its protective skin, giving bacteria and mold a direct entry point that no amount of correct temperature or humidity can fully offset. Careful harvesting, gentle handling, and sorting out any produce with cuts or soft spots before it ever reaches storage prevents a single damaged item from spreading rot to everything stacked around it.
The Ideal Temperature Range for Different Crops
The 32 to 40 degree range gets cited constantly in root cellar guides, and for most root vegetables it holds up well. Potatoes, carrots, beets, cabbage, and parsnips all do best in this cold band, with the caveat that produce should never actually freeze, since ice crystals rupture cell walls and turn a firm vegetable into mush the moment it thaws. The University of Minnesota Extension notes that even a light frost inside the storage space can undo weeks of good conditions.
Apples occupy a slightly different niche, preferring temperatures around 30 to 35 degrees, but they come with an important complication: ripening apples release ethylene gas, which speeds up sprouting and softening in nearby vegetables, particularly potatoes. Storing apples in a separate section, or at minimum on a shelf away from the main root crop bins, prevents this cross-contamination.
Winter squash, pumpkins, sweet potatoes, onions, and garlic want it noticeably warmer, generally 50 to 60 degrees. Store these in the cold zone meant for potatoes and carrots and they will suffer chilling injury, developing soft spots and off flavors well before their expected shelf life runs out. This is the crux of why root cellar temperature and humidity requirements cannot be treated as one flat number for the whole space. A well-designed cellar creates at least two thermal zones, achieved through shelving placement, partial partitions, or simply putting the warm-loving crops near the entrance where a bit of outside air mixing keeps things milder.
Cabbage falls into a middle category that trips up a lot of first-time cellar builders. It tolerates the same cold as potatoes and carrots, but it releases a strong odor as it sits in storage, one that migrates into apples, pears, and anything porous stored nearby. Wrapping individual heads in newspaper or setting aside a dedicated corner of the cellar, away from fruit and dairy if any is kept down there, keeps that smell from ruining an otherwise well-managed harvest.
Humidity Levels That Keep Vegetables Firm and Fresh
High humidity feels counterintuitive to people who associate dampness with mold, but for root vegetables it is essential rather than dangerous, provided the temperature stays cold enough to keep microbial growth in check. Most root crops want relative humidity between 85 and 95 percent, a level most household spaces never come close to. The Old Farmer’s Almanac points out that this humidity range prevents moisture loss through evaporation and the withering appearance that comes with it.
Achieving that kind of humidity usually means working with the floor material rather than fighting it. A packed dirt or gravel floor holds moisture naturally and releases it slowly, which is why old-fashioned dirt-floor cellars often outperform modern concrete builds without any extra effort. If concrete is unavoidable, shallow pans of water placed around the room, or damp burlap sacks draped over shelving, can raise humidity to workable levels.
Squash, onions, and garlic need the opposite treatment, sitting closer to 60 to 70 percent humidity with better airflow to prevent the surface mold and neck rot that thick-skinned bulbs are prone to in overly damp conditions. A hygrometer placed in each storage zone is the only reliable way to know whether these targets are actually being met, since humidity is far harder to judge by feel than temperature, and getting it wrong is one of the fastest ways to fall outside root cellar temperature and humidity requirements without ever noticing until the produce is already ruined.
Meeting Root Cellar Temperature and Humidity Requirements Across Climate Zones
Where you live changes almost everything about how a root cellar performs. In cold northern climates, meeting root cellar temperature and humidity requirements is often a matter of managing ventilation carefully so outside cold air does not overcorrect and freeze the produce, while the surrounding earth does most of the temperature stabilizing work on its own. A cellar dug several feet below the frost line in Minnesota or Alaska can hold steady numbers with minimal intervention once it is properly insulated and vented.
Warmer regions face the opposite problem. In the American South or the desert Southwest, soil temperatures at typical root cellar depths may never drop below 55 or 60 degrees, which is simply too warm for long-term potato and carrot storage no matter how well the space is built. In these climates, a traditional buried root cellar often needs supplemental cooling, evaporative pads for humidity, or a shift in strategy toward crops that tolerate warmer storage, such as winter squash and sweet potatoes, which are naturally suited to the conditions available.
Humidity presents its own regional divide. Humid climates make it easy to hit the 85 to 95 percent target for root crops but can create excess moisture problems for onions and squash, while arid climates often struggle to keep humidity high enough for root vegetables even with damp floors and water pans. Adjusting the build, whether through added insulation, a deeper dig, or auxiliary humidification, is usually more effective than trying to force a one-size-fits-all design to work everywhere.
The Role of Ventilation in Controlling Air Quality
Ventilation is frequently the piece homesteaders underestimate, treating it as an afterthought rather than a core system alongside temperature and humidity control. A well-vented root cellar uses two openings, a low intake near the floor and a higher exhaust near the ceiling, relying on the natural tendency of warm air to rise and pull cool air in behind it. This passive stack effect lets fresh, cold night air flush the space without any mechanical fans in most climates.
Beyond temperature regulation, ventilation clears carbon dioxide buildup from respiring vegetables and vents ethylene gas released by ripening apples and other fruit, both of which accelerate spoilage if allowed to accumulate in a sealed space. It also helps manage condensation, since stagnant humid air is more prone to forming water droplets on produce and shelving, which invites mold growth even when the numeric humidity reading looks correct.
Screening every vent opening against rodents and insects is a basic but easily skipped step, and one that matters just as much for root cellar temperature and humidity requirements as the vent sizing itself, since a compromised seal lets in unpredictable outside air that throws off both variables at once. Vent openings typically run four to six inches in diameter for a small to medium cellar, with dampers to close them off during extreme cold snaps.
Fans are rarely necessary in a well-sited cellar, since the temperature difference between inside and outside air is usually enough to drive passive circulation on its own. That said, a small solar-powered vent fan can help in marginal builds, particularly shallow cellars or converted basement corners where the stack effect is weak because the intake and exhaust points sit too close together in elevation. Even a modest fan running for an hour or two on cold nights can make up for a less than ideal excavation depth.
Choosing and Preparing the Right Location
Location decides more of the outcome than almost any other factor, because the ground itself does most of the temperature and moisture regulation once a root cellar is finished. A north-facing slope or the shaded side of a hill avoids direct solar heat gain, which keeps summer temperatures from creeping upward and undermining root cellar temperature and humidity requirements during the shoulder seasons when the cellar needs to hold cool air the longest.
Drainage matters just as much as shade. Sites with a high water table or poor runoff will flood a below-grade cellar during heavy rain or spring thaw, and standing water ruins stored produce far faster than any temperature fluctuation. Sandy loam or gravelly subsoil drains well and is generally considered ideal, while heavy clay sites need additional grading and drainage work before construction even begins.
For those retrofitting an existing space rather than digging from scratch, a basement corner on the north or east side of the foundation, insulated and partitioned off from the heated part of the house, can approximate many of the same conditions. The Cooperative Extension Service in Alaska notes that even a modest four foot by six foot partitioned area, if properly insulated and vented, can meet the needs of most home gardeners without a full excavation.

Tools for Monitoring Conditions Day to Day
Guesswork is the enemy of a productive root cellar. Temperature and humidity can drift gradually over weeks without any obvious visual sign until the produce is already compromised, which is why consistent monitoring is not optional if the goal is reliable storage rather than an occasional lucky season. A basic dial thermometer costs almost nothing, but a digital thermometer and hygrometer combo unit gives faster, more precise readings and often stores a log of highs and lows between checks.
Placement matters as much as the tool itself. Warm air rises, so a reading taken near the ceiling will run several degrees higher than one taken at floor level where root vegetables typically sit. Keeping a thermometer on the lowest shelf during the coldest part of winter shows exactly how close conditions are coming to freezing, while a second unit near the produce that needs warmer storage confirms that zone independently.
For anyone managing a larger cellar or storing food for a full household through winter, a wireless sensor system that reports readings to a phone or receiver saves repeated trips down cold stairs and catches sudden swings before they become a problem. Pairing any monitoring tool with a simple logbook, noting daily highs and lows, makes it far easier to spot slow seasonal drift and adjust ventilation before it costs an entire bin of vegetables. Consistent logging over a full season is really the only way to confirm that a given setup is actually meeting root cellar temperature and humidity requirements rather than just looking like it is on any single day you happen to check.
Common Mistakes That Break Root Cellar Temperature and Humidity Requirements
The single most common mistake is storing every crop together in one undifferentiated space. Potatoes and apples stacked side by side, or onions crammed next to carrots, guarantees that at least one of them is sitting outside its ideal range and speeding toward spoilage. Separating produce by its actual storage preference, even with something as simple as different crates on different shelves, solves most of this problem without any structural changes.
A second frequent error involves sealing the cellar too tightly in an effort to keep it cold, which blocks the airflow needed to manage humidity and clear ethylene and carbon dioxide. Penn State Extension has noted that many root cellar failures trace back to exactly this kind of excessive temperature variation or moisture buildup caused by poor ventilation management, both of which are preventable with correct construction and ongoing attention rather than a one-time build and forget approach.
Ignoring seasonal drift is another quiet killer. A cellar that performs beautifully in December can warm up considerably by March as outside temperatures climb, and vents that were left in a winter configuration will let in air that is no longer cold enough to help. Skipping the curing step before storage, packing wet or freshly washed vegetables straight into bins, and failing to remove spoiling produce promptly all compound these issues, since one rotting item releases moisture and gas that accelerates decay in everything stored nearby. None of these mistakes are exotic. They are ordinary oversights that quietly violate root cellar temperature and humidity requirements one small decision at a time.
Adjusting Your Root Cellar Through the Seasons
A root cellar is not a static system that gets built once and left alone. It behaves differently in every season, and the ventilation strategy that works in January will work against you by April. In fall, the priority is sealing drafts and adding insulation as outside temperatures begin dropping, while still allowing enough airflow to bring the space down to target range before the bulk of the harvest goes in.
Winter calls for close monitoring of the low end of the range, since a hard freeze can push a poorly insulated cellar below freezing and ruin an entire bin overnight. Many homesteaders keep a low-wattage light bulb or small heat source on standby for exactly this scenario, since even a modest amount of supplemental warmth can keep the space a few degrees above the danger line during extreme cold snaps.
Spring and summer flip the challenge entirely. As outside air warms, vents need to close more during the day and open only at night to draw in cooler air, and by midsummer many traditional cellars will drift up toward 55 or 60 degrees regardless of management, which is simply the reality of working with ambient ground temperature rather than mechanical refrigeration. Recognizing this cycle and adjusting proactively, rather than reacting after produce has already started to suffer, is what keeps root cellar temperature and humidity requirements met through every month of the year instead of just the easy ones.
My Two Cents
My two cents on all of this: a root cellar rewards attention far more than it rewards a fancy build. I have seen elaborate, expensive cellars fail because nobody checked the hygrometer for three weeks, and I have seen a converted closet under a staircase outperform them simply because someone walked down there every couple of days with a thermometer and made small adjustments. The numbers matter, cold and damp for roots, milder and drier for squash and alliums, but the habit of checking matters more than any single design choice.
If you are just starting out, do not aim for perfection on day one. Get a decent thermometer and hygrometer in place, watch how your space actually behaves through a full season, and adjust from there. Every cellar has its own personality based on soil, depth, and local climate, and no article, including this one, can substitute for a few months of your own observation. Start small, store crops you actually eat in quantity, and let the results teach you where your space needs help. A root cellar that gets tended consistently will outperform an expensive one that gets ignored, every single time.
Author Bio
Bob Rodgers is a lifelong outdoorsman, herbalist, and seasoned prepper with over 20 years of real-world survival experience. As the founder of PreppersWill.com, he shares practical advice on self-reliance, off-grid living, and disaster preparedness, no hype, just hard-earned lessons from decades of hands-on prepping.
Suggested resources for preppers:
What you should know about survival foods with decades of shelf life
The Foods that helped the pioneers survive crop failures and hard times
Survival Foods of the Native Americans
If you plan to build a storage room and equip it with everything needed > Start Here!
