Before we get rolling, here is a quick intro to set the scene. For generations across the American South, Appalachia, the Great Plains, and the northern beet belt, families made their own sweeteners because sugar was expensive, hard to find, or sometimes unavailable for months at a time. Learning how to make molasses at home was a normal seasonal ritual and a lifeline skill. What we call a hobby today was a survival tactic then. With more preppers rethinking their food systems, this old skill is quietly making a comeback.
The Sweet Stuff Our Ancestors Counted On
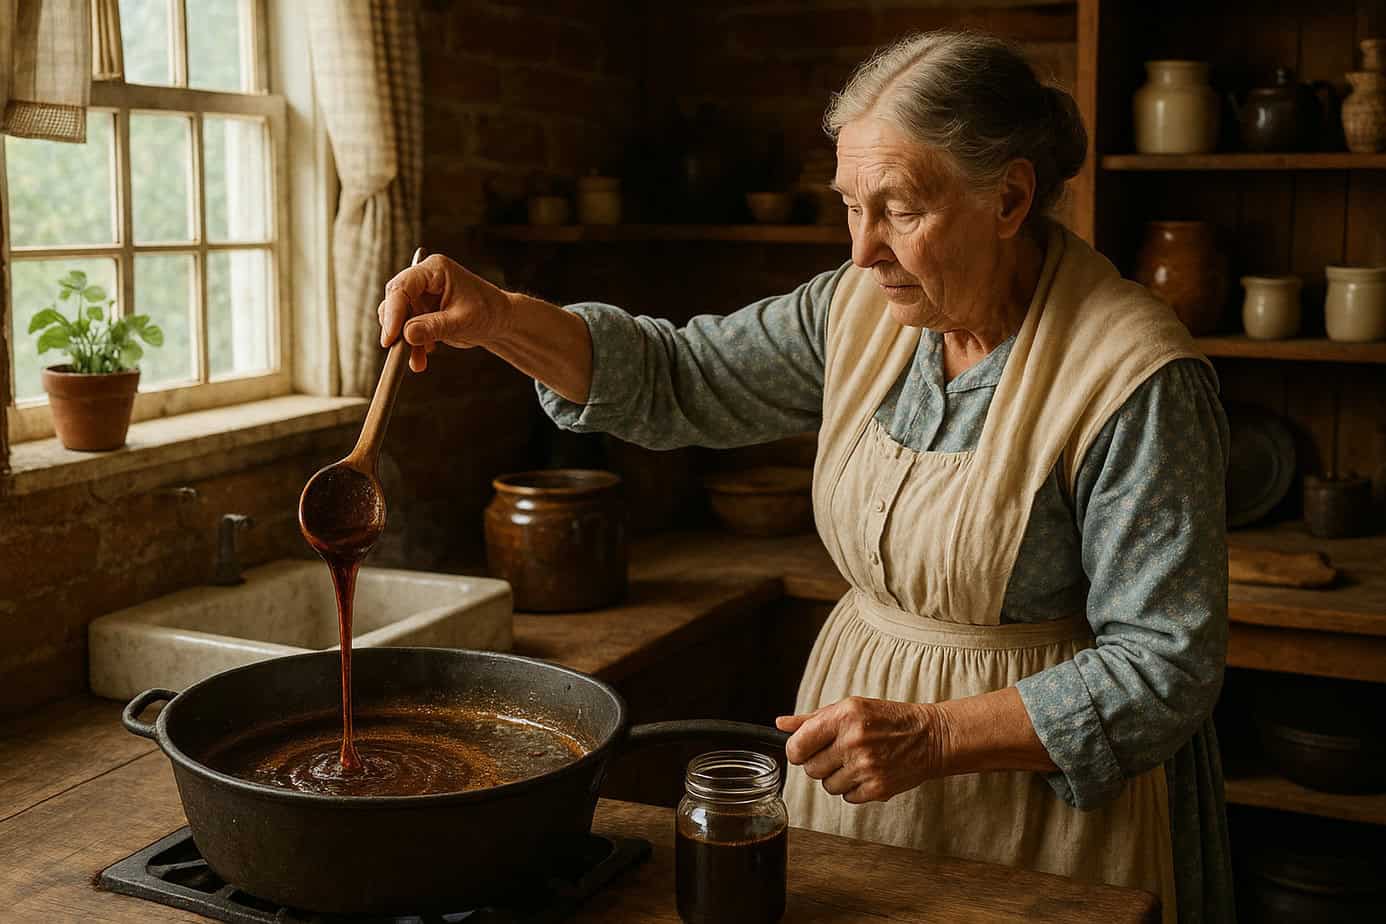
If you step back for a minute and imagine a frontier kitchen around 1880, there were only a handful of reliable sweeteners on hand. Honey, maybe if the family kept bees. Maple syrup in the northern states. And molasses, which almost every homesteader knew how to make from whatever local crop could grow in their region. You might picture a long pan set over a wood fire, steam rolling into the cold air, kids skimming foam while the adults judged the syrup by eye and feel. It was part work, part celebration.
Molasses earned its spot because it delivered calories, minerals, and flavor from crops that were fairly resilient. Families grew sugarcane in the Deep South, sorghum across the Midwest and Appalachia, and sugar beets up north. Once harvest season came around, the entire community often pitched in to press juice and cook it down. Making sweetener that lasted through the winter was serious business. Missing the harvest could mean being stuck with bland bread or weak calories during harder months.
During the rationing years of both World Wars, store sugar was harder to get and molasses became a staple again. Families leaned on old know how, and many passed that knowledge forward. Today, it is mostly older farmers, hobbyists, and traditionalists keeping the flame alive, but preppers are rediscovering the value of this forgotten craft. In a world where supply chains feel shaky and ingredients come and go, sometimes the most dependable pantry item is the one you know how to make with your own two hands.
Why Molasses Still Matters in a Modern Prepper Pantry
Even with grocery stores overflowing with shiny bags of white sugar, molasses still has a place in a serious prepper pantry. It is one of those old fashioned ingredients that turns out to be far more useful than people expect. When folks talk about learning how to make molasses at home, they usually start with flavor, but the real value goes deeper than that.
Molasses carries minerals that regular sugar lost during refining. A spoonful brings iron, potassium, magnesium, and a slow steady sweetness that does not hit your system like a sugar spike. For preppers who think about calories, nutrients, and long term food resilience, that matters more than most people realize.
It also stores incredibly well. A sealed jar kept in a cool cabinet can last years without losing quality. That kind of shelf life turns it into a reliable energy source during outages, supply hiccups, or those short term emergencies where you want to stretch the food you already have. Stir it into oats, drizzle it on skillet cornbread, mix it into a quick batch of baked beans, or blend it with warm water and a pinch of salt for a simple electrolyte drink. It does a lot of jobs and does them without fuss.
Urban preppers get value too. You do not need a big homestead to work with molasses. It is cheap to store, easy to rotate, and extremely barter friendly. People always want something sweet when times get weird. A single pint can turn bland stored grains into comforting food again.
There is also a cultural weight to it. Every family that kept a cane patch or sorghum stand understood that homemade sweetener meant independence. When you learn how to make your own, even if you only make a small batch once a year, you are stepping back into the same stream of knowledge that carried past generations through hard seasons.
Sugarcane, Sorghum, or Sugar Beets? Choosing Your Path
Before you start figuring out how to make molasses at home, the biggest question is which crop you want to work with. Each one has its own personality, its own growing habits, and its own flavor. Experienced preppers already know that picking the right crop for your region saves a lot of frustration, so let’s look at the three main players.
Sugarcane is the classic choice in the Deep South. It loves long hot summers and warm nights. If you live anywhere from Texas through Louisiana or down into Florida, cane can be a powerhouse crop. People love it because the juice yield is high and the flavor of cane molasses has that deep, smoky, old farmstead sweetness. The challenge is handling the long stalks and pressing them. Cane requires a sturdy mill, a steady harvest rhythm, and a good bit of muscle. Once you crack the process though, it feels incredibly satisfying.
Sorghum is the workhorse for much of the country. Farmers in Appalachia, the Ozarks, the Midwest, and parts of the Mountain West still grow it for syrup. It is drought tolerant, forgiving about soil, and easier to harvest than cane. The flavor is lighter and sometimes a touch grassy, but in a way that people associate with tradition. Sorghum syrup also became the go to sweetener during war rationing years because it kept families fed when sugar was scarce. If you want reliability without demanding tropical heat, sorghum is hard to beat.
Then there are sugar beets, the quiet option that does not get nearly enough attention. Northern growers appreciate them because they handle chillier climates without complaint. You pull them from the ground like any other beet, clean them up, chop them, cook them down, and strain out the sweet liquid. Beet molasses is dark and intense with a flavor that some folks describe as earthy in the best way. It is not fancy, but it is dependable, and dependable is what matters in a prepper pantry.
Choosing your crop is less about flavor and more about matching your land, your weather, and your available equipment. Think about your frost dates, your rainfall, and the amount of space you can commit. The best choice is the one that grows well without forcing you to fight nature every season.

Old School Tools That Still Make the Best Syrup
Once you know which crop you want to run with, the next step is figuring out your tools. The funny thing is that most of the gear our great grandparents used still works better than a lot of modern gadgets. When you look at old photographs from cane mills across Louisiana or sorghum presses in Appalachian hollers, you can almost feel the rhythm behind those setups. The tools were simple, strong, and meant to last for decades.
The heart of the process is the press. Traditional cane presses were big cast iron rigs with heavy rollers turned by a mule walking in slow circles. The mule did the hard work, the family fed stalks into the rollers, and sweet juice poured out the bottom. You can still find restored presses at farm auctions or homestead swaps. They are not cheap, but they are nearly indestructible. For folks who want a smaller setup, there are hand crank mills that handle sorghum and even soft cane varieties. They take some effort, but they get the job done.
Once you have juice, you need a cooking setup. Historically, people used long shallow pans fitted onto brick or rock fireboxes. A wood fire burned underneath, the juice simmered and steamed, and someone stood close by to skim off foam. That long pan design mattered because a wider surface let moisture escape faster. If you are doing this at home today, a big stainless or cast iron pan over a propane burner works surprisingly well. Cast iron adds a bit of heritage charm and holds heat nicely, but stainless gives you easier cleanup and a more controlled cook.
There are a couple of smaller tools that make life easier. Strainers, cheesecloth, a decent thermometer, and a good ladle help you remove impurities and keep the boil steady. Some homesteaders use hydrometers to check sugar concentration, but many experienced syrup makers still trust their eyes. They watch the bubbles, the thickness on a spoon, and the way the liquid sheets as they lift it. Old timers called it knowing the syrup by its voice, and there is something beautiful about keeping that tradition alive.
If you want to stay off grid, rocket stoves, wood cook stoves, and even simple cinder block fireboxes can all work. The key is steady heat. Wild temperature swings lead to scorching. A calm controlled cook gives you clean flavor and that deep color people expect from well made molasses.
How to Make Molasses at Home with Sugarcane (Traditional and Modern Methods)
If someone handed you a stack of fresh sugarcane and asked you to prove you know how to make molasses at home, this is the method you would use. Cane molasses has that deep, smoky sweetness that feels like old Southern kitchens and long harvest days. The process looks simple from the outside, but doing it well takes patience and a steady hand.
Start by cutting your cane when the stalks are full, firm, and showing good sugar content. Most growers wait until late fall because cooler nights push the sweetness upward. Strip the leaves, trim the tops, and make sure you keep only the clean, solid stalks. Dirt and dead leaves throw off the flavor, so a tidy harvest really pays off.
Next comes the pressing. Feed the stalks through your mill and catch the juice in a clean bucket. Fresh cane juice is light green and grassy at first, but it changes fast once heat hits it. Try to keep the juice moving from the press to the pan without long delays. Sitting juice can sour if the weather is warm.
Once the pan is filled, fire up your burner or wood stove and bring the juice to a steady simmer. This is where the real work starts. Foam rises to the top as impurities collect, and that foam needs to be skimmed off with a ladle or skimmer. People who grew up around old cane cooks say this is where you learn the feel of the process. Keep the simmer gentle, almost like a low rolling bubble. Too hot and you scorch it. Too cool and you will be out there all night.
As the juice reduces, the color shifts from pale green to amber, then to a rich brown. The scent changes too. You will notice a warm sweetness drifting through the air that feels almost like caramel mixed with fresh cut grass. Old time syrup makers watched the bubbles closely. Thin bubbles meant it was still watery. Thicker bubbles that held their shape meant it was getting close.
Toward the end, the syrup thickens fast. Dip a spoon and watch how the liquid falls. If it sheets slowly instead of dripping like water, you are getting close to finished molasses. A thermometer helps, but trusting your senses is part of the craft. Take your time here. Rushing the final minutes is how people scorch a whole batch.
When the syrup reaches the right thickness, pull it off the heat and strain it through a fine cloth into clean jars. Molasses will thicken more as it cools, so do not panic if it looks a little loose at first. Seal the jars, let them sit, and enjoy watching a simple crop you grew turn into a rich, valuable sweetener.
Cane molasses is the most traditional version of this craft, and once you make your first batch, you will understand why families guarded these skills so carefully. It feels like stepping into a story that started long before you and will keep going as long as people keep growing cane.
Sorghum Molasses, the Appalachian Classic
If sugarcane is the Southern workhorse, sorghum is the heart and soul of Appalachia and the Midwest. Ask anyone who grew up around old fall festivals or small family farms, and they will tell you that sorghum days were a community affair. Learning how to make molasses at home from sorghum was almost a rite of passage for farm kids. It was the kind of job where half the county showed up, everyone took turns feeding cane through the press, and the smell of simmering juice drifted across the fields.
Sorghum grows where cane will not. It handles drought, cooler nights, and tough soil with a stubborn confidence that farmers respect. The stalks look a bit like corn, only taller and slimmer. When the seed heads turn dark and the stalks feel heavy with juice, it is harvest time. Cut them close to the ground, strip the leaves, and get ready to press.
Pressing sorghum works almost exactly like pressing cane. Feed the stalks through a mill and collect the juice in a clean bucket or stainless tub. Sorghum juice starts out pale and grassy, but once the heat touches it, the scent shifts into something warm and familiar. If you grew up around it, the smell alone is enough to make you hungry.
Cooking sorghum juice follows the same rhythm as cane juice, but the foam tends to be lighter and the boiling stage feels a little calmer. Bring the juice up to a steady simmer and keep skimming. If you use a wide pan, you will notice the steam rising in slow sheets as the water cooks out. Sorghum has fewer impurities than cane, which makes it a bit easier for beginners, but timing still matters. Let it go too hot and the flavor turns sharp. Keep it too cool and you will be babysitting the pan for half the night.
The flavor of sorghum molasses is milder than cane molasses. It has a warm sweetness with a faint grassy tone that people associate with old Appalachian kitchens. During World War II sugar rationing, families relied heavily on sorghum because it produced dependable sweetness even when store shelves were bare. Many towns kept sorghum presses running year after year, not because it was trendy, but because it kept kids fed and bread flavorful.
For preppers who want a dependable crop that can handle unpredictable weather, sorghum stands out. It produces good syrup even in dry years, and you do not need deep Southern heat to make it work. Once you master the feel of the boil, you will find sorghum molasses has a calming rhythm. It is the kind of project that rewards patience and reminds you how capable simple tools and homegrown crops can be.
Sugar Beet Molasses, the Underrated Prepper Option
Sugar beets do not have the charm of tall cane stalks or the nostalgic pull of sorghum, but they offer something every prepper should respect. They grow in places where neither cane nor sorghum thrive. That makes them a quiet powerhouse for northern states, high elevation homesteads, and anyone dealing with shorter growing seasons. Learning how to make molasses at home from sugar beets gives you a reliable sweetener even when the climate feels stubborn.
The process starts by pulling the beets from the ground once they reach full size. They will look like oversized white or pale yellow roots, usually with soil clinging to every crease. Give them a good scrub. Dirt affects flavor, so take your time and clean them well. Trim off the tops and tails. What you want is the solid center root, which holds most of the sugar.
Sugar beets do not press like cane or sorghum. Their sweetness is locked inside the root, so you release it by cooking. Chop the beets into small chunks, about the size of a walnut, and toss them into a large pot. Cover with water and bring to a steady simmer. As they soften, the water turns cloudy and takes on a soft sweetness. Most folks simmer them until the chunks go tender enough to mash easily with a spoon.
Once the beets are cooked, strain the liquid through a fine cloth or mesh. The first liquid is light and mild, almost like sweetened broth. Now the real transformation begins. Pour the strained liquid into a wide pan and start reducing. The boil looks gentler than cane or sorghum, and the scent is different too. It leans earthy at first, almost like roasted vegetables with a hint of sweetness, but it mellows as the syrup thickens.
Cooking beet syrup takes patience. The reduction stage can be slower than sorghum, but the payoff is worth it. The color shifts from pale gold to a deeper brown, and the flavor grows more complex the longer it cooks. Skim foam as needed and keep the heat steady. Toward the end, check the thickness by lifting a spoon and watching how the syrup falls. When it sheets slowly and clings lightly, you are near finished molasses territory.
Beet molasses has a stronger mineral taste than cane or sorghum, and some folks need a little time to warm up to it. But once you start using it in baking, cooking beans, glazing meat, or stretching calories in winter meals, it becomes an asset. During the early 1900s, sugar beet operations helped entire regions survive shortages. Families knew they could count on beets when other crops failed.
For preppers in cooler climates, sugar beet molasses offers something valuable. It provides sweetener independence without relying on heat loving plants. It also grows well in emergency garden setups and produces heavy yields in small spaces. If resilience is the goal, sugar beets deserve a place at the table.
Troubleshooting When Learning How to Make Molasses at Home
Even experienced homesteaders hit a few bumps when making molasses. The process looks simple on paper. Press the juice, boil it down, skim the foam, and wait for that syrupy finish. In practice, small details can send a batch sideways if you are not paying attention. The good news is that every common mistake has a fix, and most problems teach you something about the craft.
One of the most frustrating issues is scorching. This usually happens when the heat gets too high or the pan has hot spots. Once molasses scorches, the flavor turns harsh and bitter. The best way to avoid it is to keep a steady, moderate simmer and stir lightly if you notice thickening near the edges. If you are cooking over wood, build a calm, even fire instead of letting flames lick the sides of the pan.
Another common hiccup is crystallization. This happens when the syrup gets taken too far and the sugar becomes unstable. You will notice grains forming at the bottom or a gritty texture. If it is mild, you can reheat the syrup and add a little water to bring it back into balance. If it is severe, it is better to accept the lesson and start fresh next time.
Off flavors also show up if the juice was pressed from damaged or dirty stalks, or if the pan was not clean. Cane and sorghum both absorb soil odors easily. Sugar beets do too. A thorough wash of all equipment, especially before the final reduction stage, prevents most flavor issues. If you notice a strong grassy or muddy smell early in the boil, skim the foam more aggressively. Sometimes impurities hide in that froth.
Separation can occur if the syrup was not cooked long enough. You will see a thin layer of liquid rise to the top after cooling. The fix is simple. Reheat the batch and reduce it a little longer until the consistency holds together.
Over thickening is another pitfall. Molasses thickens more as it cools, so if it looks perfect in the pan, it might set up like tar in the jar. A good rule is to finish it just a shade thinner than you want. If you do go too thick, warm the jar in hot water and stir in a touch of boiling water to loosen it.
Storage mistakes also catch people off guard. If molasses is poured into jars while the containers or lids are damp, mold can form. Always dry jars completely before filling and use clean cloths or mesh for straining. Molasses itself is fairly resistant to spoilage, but contamination can still creep in if sanitation slips.
Every batch teaches something. When you pay attention to the color changes, the sound of the simmer, and the way the syrup moves on a spoon, you start to build a kind of instinct. Those instincts are what turn a simple recipe into a skill you can count on when things get tough.
Storing Your Molasses for the Long Haul
Once your molasses is cooked, strained, and cooled, the next step is storage. Good storage turns a single afternoon of work into months or even years of dependable sweetness. For preppers who care about long term resilience, getting this part right matters just as much as the cooking itself.
The first rule is simple. Use clean, completely dry jars. Any lingering moisture inside a jar invites mold. Wash your jars with hot soapy water, rinse well, and let them air dry until not a single drop remains. Lids should be clean and dry as well. Even a little condensation can cause trouble later.
Molasses does not require pressure canning or water bath canning. The sugar content is high enough to make it naturally shelf stable. The key is sealing it while it is still warm. Pour the finished molasses into jars, leave a bit of headspace, and apply the lids. As the syrup cools, it creates a mild seal that helps protect the flavor.
Temperature also plays a role. A cool pantry or basement shelf keeps molasses fresher longer. Warm environments will not usually spoil it, but the flavor can darken and the texture can change over time. If you live in a hot southern climate without climate controlled storage, choose the coolest corner of your home and avoid direct sunlight.
Some old timers stored molasses in stoneware crocks covered with cloth or waxed paper. It worked, but only because they had steady cool climates and used the syrup fast. For modern preppers, glass jars with metal lids are the safest choice. They keep insects out, prevent contamination, and make it easy to check for changes.
If you notice a little sugar settling at the bottom after a few months, that is normal. Gently warming the jar in a pan of hot water will loosen everything and bring it back together. As long as there is no mold, no strange smell, and no fizzing, the molasses is still good.
Most homemade molasses stays stable for at least a year, often two or more. Sorghum usually lasts the longest, cane follows close behind, and beet molasses varies depending on how much reduction it received. Store several smaller jars instead of one large one so you are only opening what you need.
For barter situations, small jars are especially useful. A half pint of homemade molasses carries real value when sugar is scarce. It adds calories, flavor, and comfort to nearly any staple food, which makes it a smart item to keep on hand when thinking about preparedness from every angle.
Creative Ways Preppers Actually Use Molasses
Once you have jars of homemade molasses on the shelf, the real fun begins. Most people think of it as a baking ingredient, but preppers know it earns its keep in far more ways than gingerbread and cookies. The more you use it, the more you realize just how versatile a homegrown sweetener can be.
Baking is the obvious starting point. A spoonful in cornbread adds depth that plain sugar cannot match. Homemade beans simmered with a splash of molasses take on that deep, comforting flavor that used to define old farmhouse dinners. Add a little to oatcakes, skillet biscuits, or Dutch oven bread and you get richness without needing much else. During lean times, these small flavor boosts make simple meals feel satisfying again.
Molasses also shines in savory cooking. A bit mixed into marinades gives meat a glossy finish and a balanced sweetness. Old timers used it for ham glazes, venison roasts, and slow cooked pork. You can blend it with mustard, vinegar, or spices for quick sauces that hold up well even when pantry supplies are thin.
There is also the fermentation angle. Many homesteaders use molasses to kickstart homemade vinegar, meadlike drinks, or simple nutrient rich ferments. Its mineral content gives yeast and bacteria something to work with, and it helps stabilize ferments that otherwise feel sluggish. Even a small amount in a batch of homemade bread can improve the rise.
For practical preparedness, molasses works as an electrolyte booster too. Mix warm water, a pinch of salt, and a touch of molasses, and you have a simple hydrating drink that can help you push through outdoor labor or heat stress. It is not fancy, but it has been used this way for generations.
Animal feed is another traditional use. Farmers used to pour a little molasses over grain to increase calorie content and make feed more appealing. It is a trick that still works for goats, pigs, and chickens, especially in winter when energy needs climb.
Then there is the barter value. Sweetness becomes valuable fast during shortages. A small jar of homemade molasses can trade for eggs, garden produce, or labor. It is the kind of item people appreciate because it feels both practical and special at the same time.
However you use it, molasses adds richness and comfort without requiring store bought ingredients. That is why preppers who know how to make molasses at home always keep a few jars tucked away. It performs multiple roles, stretches meals, and reminds you that even simple homemade foods can carry a lot of weight in tough seasons.

Final Thoughts, Keeping the Sweet Traditions Alive
When you step back and look at the whole process, learning how to make molasses at home is more than a kitchen project. It ties you to the people who came before us, the ones who worked fields by hand, cooked over open fires, and made what they needed because no one else would do it for them. Every batch carries a little bit of that history, and you feel it when the steam rises or when the syrup thickens in the pan.
Modern life makes it easy to forget these older skills. Sweetener comes in neat bags, shelves are full, and most folks never think about where it all comes from. But preppers know that anything easy today can become a challenge tomorrow. Having the ability to grow your own sweet crops and turn them into rich, shelf stable food levels the playing field. It gives you options when options might be scarce.
Molasses is simple. Molasses is dependable. And molasses is a reminder that the old ways still hold power. Whether you are tending cane in a humid southern field, watching sorghum sway on a breezy ridge, or pulling beets from cool northern soil, you are tapping into knowledge that kept entire communities running long before grocery chains existed.
If you share a jar with family or friends, you will probably hear the same thing over and over. This tastes like something real. That is what keeps these traditions alive. Not just the sweetness, but the connection. The idea that you can take a crop grown with your own hands and turn it into something that feeds people, comforts them, and stands strong when the world feels shaky.
That is the heart of preparedness. Practical skills. Honest work. And food you can trust because it came from your land, your tools, and your effort. Molasses checks every one of those boxes, which is why it still earns a spot on the shelf of any prepper who values resilience and self reliance.
FAQ
Can you make molasses from regular white sugar?
Not exactly. You can make a molasses substitute by heating white sugar with water and a bit of store bought molasses, but real molasses only comes from sugarcane, sorghum, or sugar beets. If your goal is true homemade molasses with full mineral content, you need one of those three crops.
How long does homemade molasses last?
Most homemade molasses stays good for one to two years if stored in clean, dry, sealed jars. Cane and sorghum molasses usually last the longest. Keep jars in a cool, dark place to preserve flavor and prevent sugar separation.
How much molasses can you get from each crop?
Sugarcane gives the highest yield with the strongest flavor. Sorghum produces slightly less but is easier to grow in most regions. Sugar beets give a modest yield, but they grow well in cold climates where neither cane nor sorghum thrive. Expect several pounds of stalks or beets for each finished pint.
Do you need special equipment to make molasses at home?
You need a way to extract juice and a wide pan to cook it down. Traditional cane and sorghum presses work best, but small hand crank mills also get the job done. For sugar beets, no press is needed since you extract sweetness by simmering chopped roots. After that, any large pot or pan with a steady heat source will work.
Why does homemade molasses taste different from store bought?
Most store molasses is a byproduct of sugar refining and often has additives for consistency. Homemade molasses comes directly from the crop itself, which gives it a richer and more complex flavor. Soil, weather, and cooking technique all shape the final taste, which is why homemade versions always feel more alive and less uniform.
About the Author:
Rhonda Owen is a 60-year-old homesteader, off-grid gardener, and long-time contributor to PreppersWill. For over a decade, she has shared practical, no-nonsense advice on food preservation, self-sufficiency, and rural living. Living partially off-grid in the Ozarks, Rhonda grows, cans, and preserves nearly all her own food while mentoring families on how to build sustainable, long-term preparedness systems. Her writing blends hard-earned experience with tested survival principles you can trust.
Other resources:
What you should know about survival foods with decades of shelf life
The Foods that helped the pioneers survive crop failures and hard times
Survival Foods of the Native Americans
If you plan to build a storage room and equip it with everything needed > Start Here!